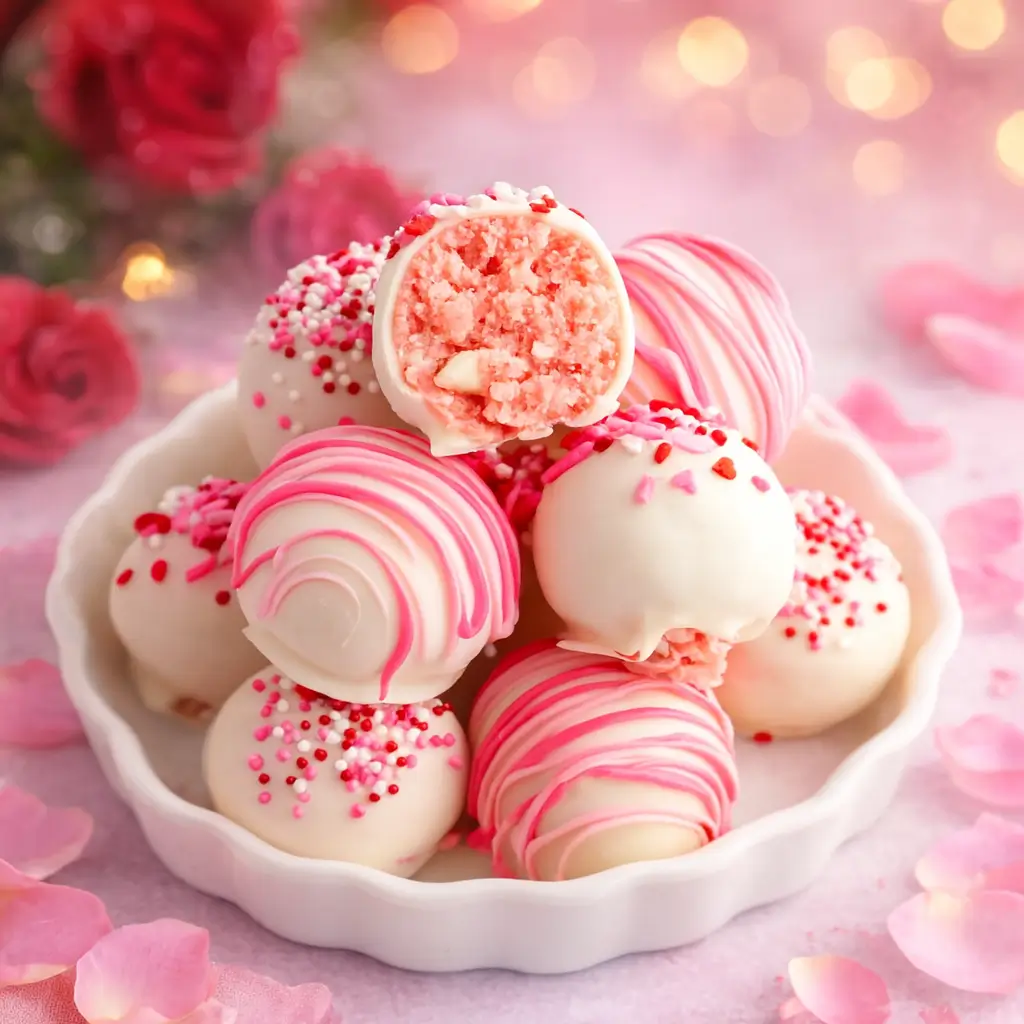
Strawberry No Bake Cake Balls are your new secret weapon for when you want a dessert that’s as adorable as it is delicious—without turning your kitchen into a sauna. These little pink bites of joy combine strawberry cake mix, cream cheese, and white chocolate into dreamy truffle-like treats that are perfect for Valentine’s Day, birthday parties, or honestly, any Tuesday that needs a little sparkle. They’re rich, creamy, and irresistibly festive, and the best part? You don’t even have to bake them. If you love quick, crowd-pleasing desserts, Strawberry No Bake Cake Balls will absolutely hit the sweet spot.
Table of Contents
What is Strawberry No Bake Cake Balls?
Strawberry No Bake Cake Balls are a simple, make-ahead dessert that delivers all the flavor of a homemade cake without the hassle of baking. The base starts with a strawberry cake mix (baked briefly to make it safe to eat raw), then it’s blended with softened cream cheese for that ultra-smooth, truffle-like texture. Rolled into bite-sized balls and dipped in silky white chocolate, these treats look like something from a fancy bakery—but they’re easy enough for anyone to make at home. Perfect for those times when you want something festive without spending hours in the kitchen, these cake balls are proof that you don’t need an oven to create a show-stopping dessert.
Reasons to Try Strawberry No Bake Cake Balls
If you’ve ever craved something sweet but dreaded the clean-up from baking, these Strawberry No Bake Cake Balls are a total lifesaver. They’re no-bake (so no oven babysitting), totally customizable with sprinkles or candy drizzle, and kid-approved for both taste and fun. They make the perfect dessert for holidays, potlucks, or as a last-minute gift idea when you need to bring something pink, cute, and homemade. Plus, with just a few pantry staples, you can whip up a batch that looks professional but tastes like comfort food. Think of them as your “instant dessert glow-up”—effortless but impressive.
Ingredients Needed to Make Strawberry No Bake Cake Balls
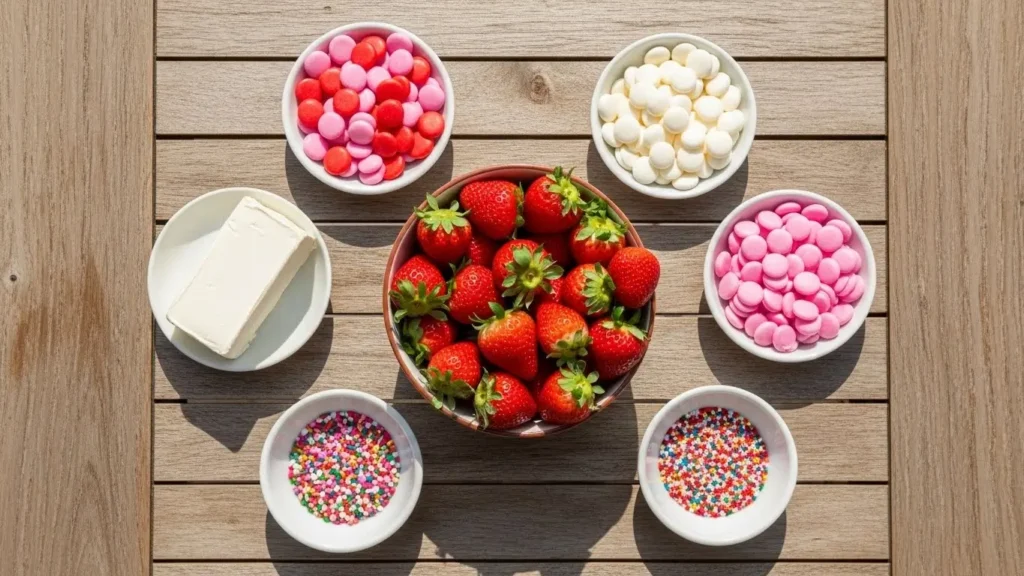
- 15.25 oz strawberry cake mix
- 8 oz block cream cheese, softened
- ⅓ cup cream cheese chips, roughly chopped
- 20 oz Ghirardelli vanilla melting wafers
- Sprinkles of your choice (optional)
- ½ cup Wilton pink candy melts (optional)
- ½ cup Wilton bright pink candy melts (optional)
Instructions to Make Strawberry No Bake Cake Balls
Ready to make these adorable, creamy Strawberry No Bake Cake Balls? Follow this step-by-step guide carefully, and you’ll have a tray of stunning, melt-in-your-mouth treats that look bakery-worthy but are secretly super simple. This step-by-step process walks you through each phase — from prepping your cake mix safely to mastering that perfect chocolate dip — so you’ll feel confident from start to finish.
Step 1: Prepare the Strawberry Cake Mix
Start this step-by-step process by preheating your oven to 350°F. This might sound strange since this is a no-bake dessert, but there’s one quick bake step to make the dry cake mix safe to eat. Line a baking sheet with parchment paper, then spread the strawberry cake mix evenly across the surface. Bake for about 5 minutes, or until the mix reaches 165°F. This short bake kills any potential bacteria in the raw mix while keeping that fresh, fruity flavor intact.
Once baked, remove the tray and let the cake mix cool completely. Don’t rush this part — if the cake mix is warm, it can melt your cream cheese later and change the texture. While waiting, check out our No Bake Strawberry Cheesecake Bars for another chilled dessert that skips the oven but never the flavor.
Step 2: Blend the Cream Cheese and Cake Mix
Now for the creamy magic. In a medium-sized mixing bowl, add the cooled strawberry cake mix and one softened block (8 oz) of cream cheese. Using a hand mixer, beat the ingredients together on medium-high until smooth, fluffy, and fully combined. You’re looking for a thick, velvety consistency that’s easy to shape but still holds its form.
If the mixture feels too soft, pop it in the fridge for 10–15 minutes before moving to the next step. A slightly firmer texture makes it easier to roll into even-sized balls later. For more mixing tips, see our Red Velvet Truffles recipe—the technique is almost identical, just with a different flavor twist.
Step 3: Fold in the Cream Cheese Chips
Once your mixture is smooth, it’s time to add texture and flavor bursts. Using a rubber spatula, gently fold in ⅓ cup of roughly chopped cream cheese chips. Don’t skip the folding — stirring too aggressively can make the mixture heavy and lose its light, whipped feel. The chips add a delicious, creamy bite in every piece. If you can’t find cream cheese chips, you can substitute white chocolate chips or even chopped white baking bars (see our ingredient swap guide for more ideas).
Step 4: Chill the Mixture
Cover the bowl tightly with plastic wrap and refrigerate it for at least 2 hours. This step is crucial in the step-by-step process because chilling allows the mixture to firm up, making it much easier to shape later. If you’re in a hurry, you can place it in the freezer for about 30 minutes, but don’t let it harden completely. This downtime is the perfect chance to prep your dipping station — line two baking sheets with parchment paper and set out your sprinkles and candy melts so everything’s ready when you are.
Step 5: Scoop and Shape the Cake Balls
Once chilled, remove the mixture from the fridge and grab your 1½-tablespoon cookie scoop. Scoop out even portions and place them onto your prepared baking sheets. Roll each scoop gently between your palms to form smooth, round balls. The goal is consistency — this helps them dip and coat evenly later on. Let the balls rest at room temperature for about 15 minutes; this allows them to expand slightly and helps prevent cracking once dipped in chocolate.
If you’ve got little helpers in the kitchen, this is a great step-by-step activity for kids — they’ll love rolling and shaping! (Just make sure they resist eating them before the chocolate bath!)
Step 6: Melt the White Chocolate
Now for the fun (and slightly messy) part. Place your Ghirardelli vanilla melting wafers in a microwave-safe bowl and heat in 30-second intervals, stirring between each one. Continue until the chocolate is smooth and glossy. Overheating can cause it to seize up, so patience is key here. You can also melt the chocolate using a double boiler for a more controlled process — if you’ve never tried that, our Valentine’s Day Fudge recipe walks you through it beautifully.
Step 7: Dip and Decorate
Using a fork or dipping tool, gently lower each chilled ball into the melted chocolate, rolling it until fully coated. Lift it out and let the excess drip off before placing it back on the parchment paper. If you’re adding sprinkles, do it immediately — the chocolate sets quickly! This step-by-step technique ensures a smooth, even finish that looks picture-perfect every time.
For an extra pop of color, melt your pink and bright pink Wilton candy melts. Drizzle them over the top using a spoon or transfer them to a piping bag for more precise lines. You can mix up your drizzle colors or even create a marble effect by alternating the candy melts — get creative and make them your own!
Step 8: Let Them Set and Serve
Allow the coated cake balls to rest at room temperature until the chocolate fully hardens, which usually takes about 20–30 minutes. Once set, they’re ready to enjoy! You can serve them chilled for a firmer bite or at room temperature for a softer, melt-in-your-mouth texture.
And there you have it — your step-by-step guide to making perfect Strawberry No Bake Cake Balls that are equal parts beautiful and delicious. Whether you’re serving them at a party, gifting them in a cute box, or sneaking one with your afternoon coffee, these sweet little bites always bring smiles.
For more desserts that follow the same easy step-by-step approach, you’ll love exploring our Chocolate Raspberry Truffles or Cherry Kiss Cookies. They’re all quick, make-ahead treats that deliver big flavor without the oven drama.
What to Serve with Strawberry No Bake Cake Balls
These Strawberry No Bake Cake Balls pair beautifully with a glass of cold milk, a cup of coffee, or a flute of bubbly if you’re celebrating something special. They look stunning on a dessert board alongside chocolate raspberry truffles or Valentine’s fudge for a themed spread. For a casual touch, you can even skewer them on sticks for a cake pop vibe at parties. Whether you’re serving them after dinner or wrapping them up as a homemade gift, they fit any mood—sweet, fun, and a little fancy without the fuss.
Key Tips for Making Strawberry No Bake Cake Balls
- Bake the cake mix first. This step might feel odd, but it’s key to making the mix safe to eat raw.
- Soften your cream cheese. It should be room temperature for that smooth, creamy texture.
- Work in batches when dipping. Melted chocolate can cool fast, so dip a few balls at a time and add sprinkles right away.
- Chill before coating. Cold dough helps the chocolate set evenly without cracking.
- Add kids to the sprinkle team. Seriously—this is one of those recipes where little hands make it more fun (and more colorful).
Storage and Reheating Tips Strawberry No Bake Cake Balls
Store your Strawberry No Bake Cake Balls in an airtight container in the refrigerator for up to 5 days. Because they contain cream cheese, they’re best kept chilled until serving. If you prefer them softer, remove them from the fridge about 15 minutes before eating. You can also freeze them—just place them in a single layer on a tray to freeze, then transfer to a freezer-safe container for up to a month. Thaw overnight in the fridge before serving.
FAQs
Can I use a different cake mix? Absolutely! Vanilla or funfetti mixes work well for a different twist.
Do I have to use candy melts? Nope. The pink drizzle is optional but adds a festive touch.
Can I make them ahead? Yes—these actually taste better the next day once the flavors meld.
Final Thoughts
Strawberry No Bake Cake Balls are proof that you don’t need to spend hours baking to create something beautiful and delicious. They’re fun, festive, and full of that nostalgic strawberry sweetness that just makes you smile. Whether you’re making them for Valentine’s Day or just because you had a rough Monday, this recipe delivers joy in every bite. For more easy no-bake dessert ideas, check out our Valentine’s Day Fudge or Cherry Kiss Cookies. Life’s too short for boring desserts—these cake balls are your pink ticket to instant happiness.
Visit our Pinterest for regular slow cooker recipe updates, or join our Facebook discussions where cooking fans exchange their favorite hearty meal ideas.
Print
Strawberry No Bake Cake Balls – Quick, Sweet, and Fun Dessert
- Prep Time: 1 hour
- Cook Time: 5 minutes
- Total Time: 3 hours
- Yield: 20 balls 1x
- Category: Dessert
- Method: No Bake
- Cuisine: American
Description
These simple strawberry no bake cake balls combine strawberry cake mix, cream cheese, and white chocolate for the perfect treat for Valentine’s Day, birthday parties, and more!
Ingredients
- 15.25 oz strawberry cake mix
- 8 oz block cream cheese, softened
- 1/3 cup cream cheese chips, roughly chopped
- 20 oz Ghirardelli vanilla melting wafers
- Sprinkles of your choice, optional
- 1/2 cup Wilton pink candy melts, optional
- 1/2 cup Wilton bright pink candy melts, optional
Instructions
1. Preheat the oven to 350°F and line a baking sheet with parchment paper.
2. Spread the dry cake mix on the baking sheet and bake for 5 minutes, or until it reaches 165°F. Let it cool completely.
3. Add cooled cake mix to a medium bowl. Add softened cream cheese and beat with hand mixer on medium-high until light and creamy.
4. Fold in cream cheese chips with a rubber spatula until evenly distributed.
5. Cover and refrigerate the mixture for 2 hours.
6. Line two baking sheets with parchment or wax paper. Use a 1.5 tablespoon scoop to portion dough onto sheets, then roll each into a smooth ball.
7. Let the balls rest on the baking sheet for 15 minutes to expand slightly.
8. Melt vanilla melting wafers in a microwave-safe bowl in 30-second increments, stirring in between until smooth.
9. Dip each ball into the melted vanilla chocolate, tap off excess, and return to baking sheet. Immediately add sprinkles before the coating hardens.
10. Melt candy melts using same method and drizzle over truffles using a spoon or piping bag for decoration.
11. Allow all decorations to set and harden completely before serving.
Notes
Make sure to add sprinkles before the white chocolate hardens so they stick properly.
Dip and decorate one ball at a time for best results—it’s easier with a helper!
Store in an airtight container in the refrigerator for up to 5 days due to the cream cheese.
Let truffles sit out for 15 minutes before serving if you prefer them at room temperature.
Nutrition
- Serving Size: 1 ball
- Calories: 181kcal
- Sugar: 21g
- Sodium: 241mg
- Fat: 6g
- Saturated Fat: 5g
- Carbohydrates: 28g
- Fiber: 0.01g
- Protein: 2g
- Cholesterol: 2mg