Red Velvet Truffles are the little bites of joy you didn’t know you needed until now. Soft, creamy, and covered in silky white chocolate, these gems bring together everything we love about red velvet cake—but without the hassle of frosting layers or cutting slices. Whether it’s Valentine’s Day, Christmas, or just one of those Tuesday nights when you need something sweet after the kids are finally in bed, these truffles are your go-to.
Using a boxed cake mix means you can whip these up without spending your whole afternoon in the kitchen (because let’s be honest, nobody has time for that). These pretty, bite-sized treats make adorable gifts, party snacks, or freezer-friendly desserts. Once you’ve made them, you’ll realize they’re dangerously easy to love—and even easier to eat.
Table of Contents
What is Red Velvet Truffles?
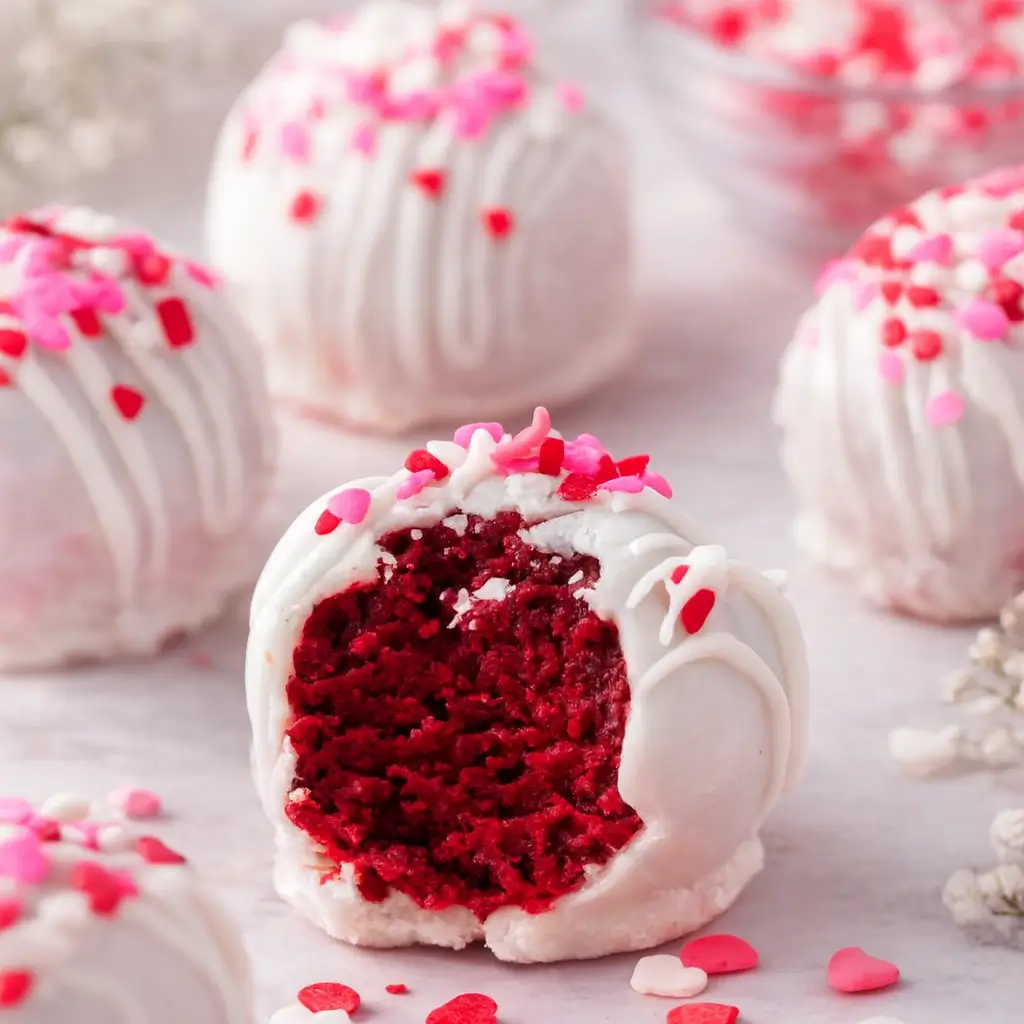
Red Velvet Truffles are like the fancy cousin of cake pops—minus the stick. They’re made by combining baked red velvet cake with cream cheese to form a rich, fudgy dough that’s then dipped in melted white chocolate. The end result? A smooth, chocolate-coated shell that gives way to a soft, decadent center that tastes like pure celebration.
If you’ve ever had red velvet cake and wished you could eat it in a bite or two without needing a fork, this is it. They’re also endlessly customizable—dress them up with festive sprinkles for holidays, drizzle extra white chocolate for flair, or roll them in cake crumbs for that bakery-style look. The best part is how simple they are to make, especially if you start with a box mix. So yes, these truffles deliver that made-from-scratch flavor without the stress.
Reasons to Try Red Velvet Truffles
Why should you try Red Velvet Truffles? Because they’re the definition of easy decadence. You only need a few ingredients, most of which are pantry staples, and the results look like something straight from a boutique bakery. They’re perfect for when you want to impress without the fuss—think potlucks, cookie exchanges, or Valentine’s dessert platters.
Plus, they’re freezer-friendly, meaning you can make a batch ahead and sneak one whenever that sweet craving hits. Kids love helping roll the dough and dip them in chocolate (though fair warning, things might get messy). They’re also a hit with adults because they hit that perfect balance of creamy, sweet, and tangy. Basically, these truffles are what happens when red velvet cake meets convenience and charm. Oh, and if you’re a fan of bite-sized treats, you’ll probably also love these No Bake Strawberry Cheesecake Bars for your next dessert spread.
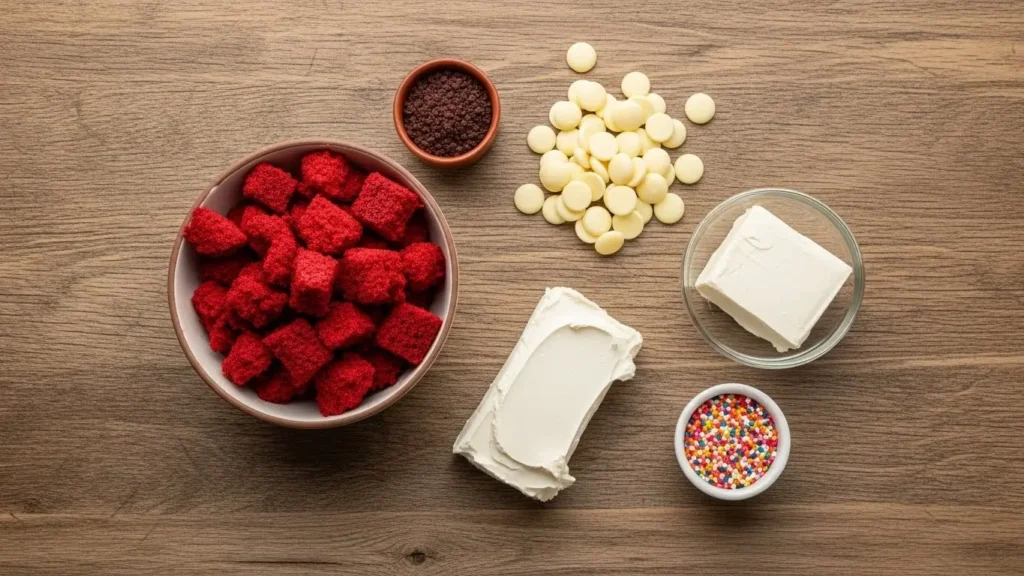
Ingredients Needed to Make Red Velvet Truffles
- 1 box red velvet cake mix
- Ingredients listed on cake mix box (usually water, oil, and eggs)
- 10 oz cream cheese, softened
- 12 oz almond bark or white chocolate candy melts
- Festive sprinkles for garnish
Instructions to Make Red Velvet Truffles (Step-by-Step Guide)
Let’s walk through how to make Red Velvet Truffles step by step, from mixing that luscious dough to creating those perfectly coated, bakery-style bites. Each step is easy to follow—even if your kitchen skills lean more toward “Pinterest beginner” than “Bake-Off finalist.”
Step 1: Bake the Red Velvet Cake
Start by preparing the red velvet cake according to the instructions on the box. Most mixes call for water, oil, and eggs—simple enough. Pour the batter into a 9×13-inch baking pan (or use two smaller pans if that’s what you’ve got handy). Bake as directed until a toothpick inserted in the center comes out clean. The secret here? Let your cake cool completely before you even think about the next step. If it’s warm, your truffle dough will turn into a sticky mess. This is a great time to grab a cup of coffee—or check out our No Bake Strawberry Cheesecake Bars for another easy dessert idea while you wait.
Step 2: Crumble the Cake (The Fun Part)
Once your cake has cooled, trim off any crisp edges—those don’t mix well in the dough. Then, using clean hands, crumble the cake into fine, even crumbs in a large mixing bowl. You’re going for a soft, fluffy texture that looks almost like potting soil (but way tastier). Don’t be afraid to get messy here; it’s oddly satisfying. If your kids are nearby, this is the perfect hands-on task to keep them entertained.
Step 3: Mix with Cream Cheese
Add the softened cream cheese to your crumbled cake. Mix everything together until it forms a dough-like consistency. Using your hands is the easiest way to really blend the two. The cream cheese adds richness and helps bind the crumbs into smooth, fudgy dough. The texture should feel like soft cookie dough—sticky but manageable. If it’s too dry, add a teaspoon more of cream cheese. If it’s too wet, pop it in the fridge for 10–15 minutes to firm up. Need more tips on adjusting texture? You might find our Valentine’s Day Fudge recipe helpful—it explains how small tweaks make a big difference in dessert consistency.
Step 4: Shape into Truffles
Now comes the shaping. Using a cookie scoop or your hands, scoop out about 2 tablespoons of dough per truffle. Roll each portion into a smooth ball and place it on a parchment-lined baking sheet. This step-by-step shaping process ensures your truffles are uniform, which helps them coat evenly later. Once all the truffles are rolled, place the tray in the freezer for about 30 minutes. Chilling helps them firm up and hold their shape when dipped into the warm chocolate.
Step 5: Melt the White Chocolate
While the truffles are chilling, prepare your coating. Place white chocolate candy melts or almond bark in a microwave-safe bowl. Heat in 30-second intervals, stirring after each, until the chocolate is smooth and fully melted. Be patient—overheating can cause clumping (and nobody wants lumpy truffles). If the mixture feels too thick, add a teaspoon of coconut oil to thin it out. This is one of those step-by-step tricks that makes your coating silky and easy to work with. For more candy-melting success, take a peek at our Chocolate Raspberry Truffles guide, where we share extra melting tips.
Step 6: Dip and Decorate
Using a fork or dipping tool, carefully lower each truffle into the melted chocolate, coating it evenly. Tap gently on the side of the bowl to remove excess chocolate—this keeps the shell thin and smooth. Set each coated truffle back onto the parchment paper. Before the coating hardens, decorate with festive sprinkles or a drizzle of contrasting chocolate. You can even sprinkle crushed cake crumbs for a fancy finish. If you’re making these for a themed event, color your sprinkles to match the occasion—red and pink for Valentine’s Day, green and white for Christmas, or blue and silver for winter parties.
Step 7: Let Them Set
Once decorated, let your truffles rest until the coating is firm. You can refrigerate them for faster setting (about 10 minutes) or leave them at room temperature if your kitchen is cool. This final step-by-step hardening process locks in that creamy center and ensures the shell stays glossy and beautiful.
Step 8: Serve and Enjoy
You did it! You’ve just made Red Velvet Truffles step by step—and they look stunning. Arrange them on a decorative platter, box them up as homemade gifts, or sneak one for yourself (no judgment). For an extra treat pairing, serve alongside a warm mug of cocoa or one of our Crockpot Chicken and Potatoes dinners to end your meal on a sweet note.
Pro Tip: These truffles freeze beautifully. Just store them in an airtight container for up to two months. When you’re ready to serve, let them thaw in the fridge for a few hours.
This step-by-step Red Velvet Truffles guide takes you from simple ingredients to fancy dessert magic without the stress. With a few basic tools, some patience, and a dash of creativity, you’ll have professional-looking truffles that taste as indulgent as they look. For more easy dessert inspiration, explore our collection of holiday sweets and no-bake recipes.
What to Serve with Red Velvet Truffles
These truffles are sweet little showstoppers, but they play nicely with others. Pair them with a steaming cup of coffee, a mug of hot cocoa, or even a glass of chilled milk. They’re the perfect partner to creamy desserts like Valentine’s Day Fudge or light options like fruit parfaits. For a dessert platter, mix them with chocolate-dipped strawberries, sugar cookies, or your favorite holiday candies. If you’re serving them after dinner, they also look beautiful on a charcuterie-style dessert board with nuts, berries, and pretzels. Basically, Red Velvet Truffles fit in anywhere—from cozy family nights to elegant parties.
Key Tips for Making Red Velvet Truffles
- Let the cake cool completely—warm cake will melt the cream cheese and ruin the texture.
- Use quality chocolate—good almond bark or candy melts make a difference in flavor and coating smoothness.
- Don’t skip freezing—it helps keep the truffles firm and easy to dip.
- Get creative with toppings—use sprinkles, extra cake crumbs, or drizzle contrasting chocolate.
- Avoid overmixing—you want a moist dough, not a paste.
- Double the batch—trust me, they disappear fast!
Storage and Reheating Tips for Red Velvet Truffles
Store your Red Velvet Truffles in an airtight container in the fridge for up to a week. If you prefer to plan ahead, freeze them for up to two months. Just thaw in the refrigerator overnight before serving. Keep them cool if you’re serving outdoors or at a party—they can soften if left in warm temperatures too long. Since they’re bite-sized, there’s really no need for reheating (unless you like your truffles slightly melty, in which case a 5-second zap in the microwave does the trick). These also make great make-ahead treats for holidays—just decorate after thawing to keep the sprinkles fresh and crisp.
FAQs
Can I use homemade red velvet cake instead of a mix? Absolutely! Any red velvet cake works, as long as it’s soft and crumbly.
What if I don’t have cream cheese? Try frosting instead—it’ll give a similar sweetness, though less tangy.
Can I use milk chocolate instead of white? You can! The flavor will shift to more chocolatey richness but still taste amazing.
How do I make them gluten-free? Use a gluten-free red velvet cake mix, and you’re good to go.
Do these need to stay refrigerated? Yes, because of the cream cheese. Serve chilled for the best texture.
Final Thoughts
There’s something irresistibly nostalgic about Red Velvet Truffles—they bring together comfort and elegance in one sweet bite. Whether you’re making them for a special occasion or just because, they’re guaranteed to earn rave reviews from everyone lucky enough to try one. They’re quick, fun to make, and they look like you spent way more time on them than you actually did. And if you’re in the mood for more no-fuss desserts, check out our No Bake Strawberry Cheesecake Bars next—they pair beautifully with these truffles for any celebration.
Visit our Pinterest for regular slow cooker recipe updates, or join our Facebook discussions where cooking fans exchange their favorite hearty meal ideas.
Print
Red Velvet Truffles: Easy No-Bake Treat for Any Occasion
- Prep Time: 10 minutes
- Cook Time: 30 minutes
- Total Time: 1 hour 10 minutes
- Yield: 15 truffles 1x
- Category: Dessert
- Method: No Bake
- Cuisine: American
Description
Red Velvet Truffles are made with a cake mix and are coated in a creamy white chocolate shell. They are perfect for Valentine’s Day, Christmas, or any time.
Ingredients
- 1 Red velvet cake mix
- Cake mix ingredients (water, oil, eggs)
- 10 oz cream cheese, softened
- 12 oz almond bark OR white chocolate candy melts
- Festive sprinkles
Instructions
1. Prepare the red velvet cake following the box instructions. Bake in a 9×13 pan as per box instructions. Allow to cool completely before moving to the next step.
2. Remove the crisp outer edges of the cake and discard. In a large mixing bowl, crumble the rest of the cake into small pieces. Add the softened cream cheese and mix (easiest with hands) until a dough has formed.
3. Scoop the cake mixture into balls (about 2 Tablespoonfuls of cake mixture per ball) and place on a baking sheet lined with parchment paper. Freeze for 30 minutes or until hardened.
4. Place the white chocolate in a bowl and heat, stirring every 30 seconds until melted.
5. Dip each cake ball into the white chocolate and tap off any excess chocolate. Place back onto the parchment paper-lined baking sheet. If desired, garnish with white chocolate drizzle and festive sprinkles. You can also garnish with extra cake crumbs.
6. Place back into the freezer for a few minutes to allow the white chocolate to set or let harden at room temperature.
Notes
You can use either almond bark or white chocolate candy melts depending on your preference.
Make sure the cake is completely cool before mixing with cream cheese for best texture.
These truffles can be stored in an airtight container in the refrigerator for up to 5 days.
Great for gifting or serving at parties and holidays.
Nutrition
- Serving Size: 1
- Calories: 260
- Sugar: 7g
- Sodium: 199mg
- Fat: 22g
- Saturated Fat: 7g
- Unsaturated Fat: 14g
- Trans Fat: 0g
- Carbohydrates: 12g
- Fiber: 3g
- Protein: 7g
- Cholesterol: 26mg