If there’s one cookie that can instantly make you feel like it’s the holidays, it’s the Red Velvet Crinkle Cookie. That bright red color dusted in powdered sugar is pure magic—like snowflakes meeting cake batter. Whether you’re baking them for a cookie exchange, a family movie night, or just because it’s Tuesday and you deserve something sweet, this cookie never disappoints.
Soft in the middle, slightly chewy on the outside, and packed with that cocoa-vanilla flavor that makes red velvet irresistible, it’s the kind of treat that brings people running to the kitchen. What’s even better? They’re surprisingly easy to make, and you probably already have most of the ingredients in your pantry. These Red Velvet Crinkle Cookies are everything we love about the holidays baked into one delicious bite—comforting, sweet, and just a little fancy without trying too hard.
Table of Contents
What is a Red Velvet Crinkle Cookie?
A Red Velvet Crinkle Cookie is what happens when cake meets cookie in the best way possible. Imagine the soft, rich flavor of red velvet cake but in a handheld form that’s slightly crispy on the edges and tender in the center. The “crinkle” part comes from the cookie’s signature cracked surface, created when the dough is rolled in powdered sugar before baking.
As the cookies puff up in the oven, they split and reveal that gorgeous red interior. They’re like the snow-dusted cousin of the classic chocolate cookie—festive, pretty, and utterly addictive. Traditionally made with cocoa powder and a hint of vanilla, these cookies get their iconic color from red food coloring, though some bakers use beet powder for a natural twist. Whether you’re a seasoned baker or just starting out, Red Velvet Crinkle Cookies make you look like a pro with minimal effort.
Reasons to Try Red Velvet Crinkle Cookie
First off, these cookies are total showstoppers. They look like they belong in a bakery window but are simple enough to whip up in your kitchen after work. The deep red hue makes them perfect for Christmas, Valentine’s Day, or even when you just need a pop of color on your dessert tray. Second, the flavor is next-level comforting—rich cocoa balanced with buttery sweetness and a whisper of vanilla.
Third, they’re the kind of cookie that stays soft for days, which makes them great for gifting or meal prepping your dessert stash (yes, that’s a thing). They’re kid-approved, coworker-approved, and Santa-approved. And if you’re a fan of festive desserts, check out Easy Pecan Pie Cookies or Snickerdoodle Cobbler for more crowd-pleasing treats that taste like comfort in every bite.
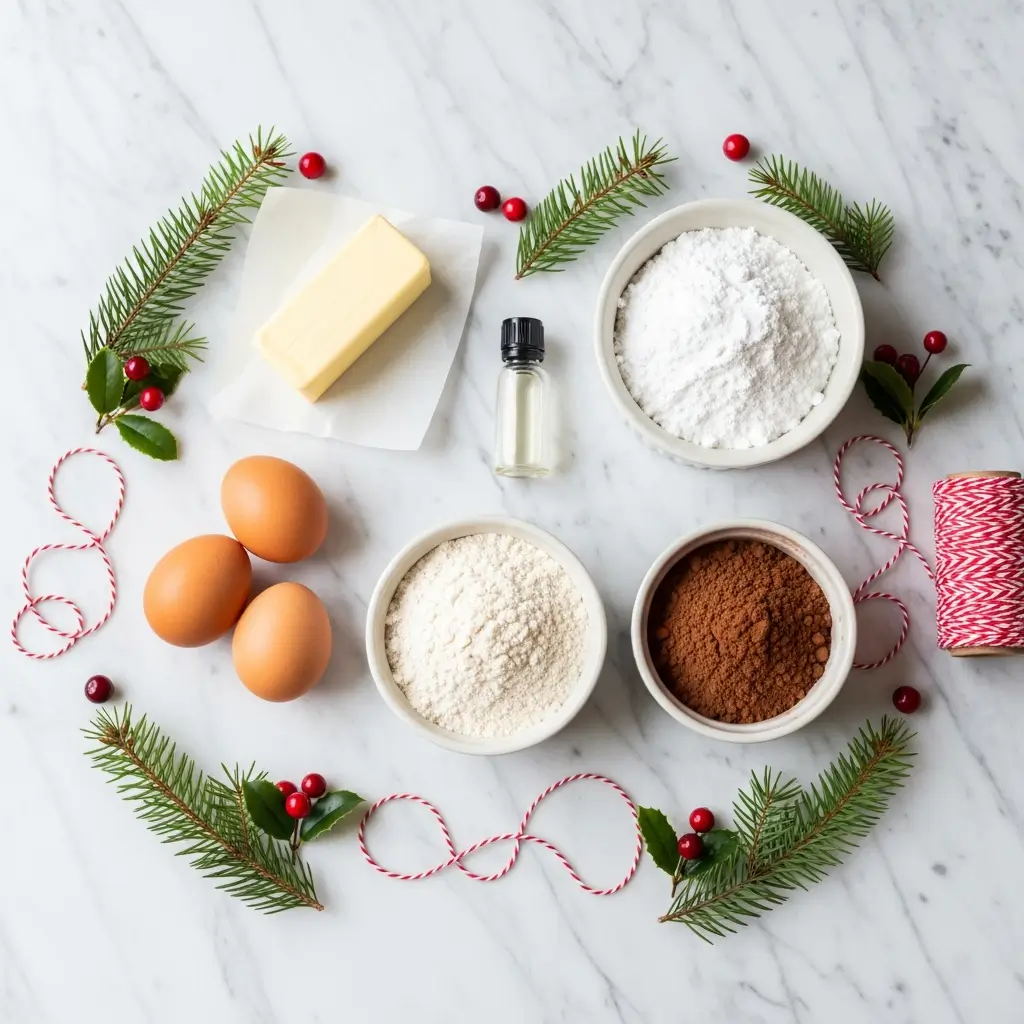
Ingredients Needed to Make Red Velvet Crinkle Cookie
- 1 1/2 cups all-purpose flour
- 1/2 cup unsweetened cocoa powder
- 1 tsp baking powder
- 1/4 tsp salt
- 1/2 cup unsalted butter, softened
- 1 cup granulated sugar
- 2 large eggs
- 1 tsp vanilla extract
- 1 tbsp red food coloring
- 1/2 cup powdered sugar, for rolling
Instructions to Make Red Velvet Crinkle Cookie
Ready to make your kitchen smell like a bakery? Let’s walk through how to bake these gorgeous Red Velvet Crinkle Cookies step by step. Even if you’ve never baked from scratch before, you’ll find this process simple, fun, and totally rewarding. Grab your apron—it’s about to get delicious.
Step 1: Preheat and Prep Like a Pro
Before diving into the dough, start by preheating your oven to 350°F (175°C). This step is crucial for even baking—it ensures that once your cookies hit the heat, they start cooking immediately. Line two baking sheets with parchment paper to keep your cookies from sticking and to make cleanup a breeze. If you’ve never used parchment before, it’s one of those small baking upgrades that feels life-changing (you can read more about its benefits in our Cinnamon Sweet Potato Breakfast Cookies post). Set the pans aside while you prepare your dough.
Step 2: Mix the Dry Ingredients
In a medium bowl, whisk together 1 1/2 cups flour, 1/2 cup cocoa powder, 1 teaspoon baking powder, and 1/4 teaspoon salt. Whisking might seem like a small detail, but it evenly distributes the baking powder and prevents clumps of cocoa. This is your dry mixture—the foundation of your cookie’s texture. If you’re curious about ingredient swaps (like gluten-free flour), you can check out our guide in Honey Cinnamon Oatmeal Bread, where we cover simple baking substitutions that don’t compromise taste.
Step 3: Cream the Butter and Sugar
In a large mixing bowl, beat together 1/2 cup softened butter and 1 cup granulated sugar until the mixture looks pale and fluffy—about two to three minutes. This creaming process is what gives your cookies that soft, bakery-style interior. You’re essentially trapping air inside the butter, which will puff up as it bakes. For best results, use a hand mixer or stand mixer. Add in two eggs, one at a time, beating after each addition. Then stir in 1 teaspoon vanilla extract and 1 tablespoon red food coloring. The dough should look vibrant, smooth, and rich—kind of like cake batter on its best day.
Step 4: Combine Wet and Dry Mixtures (Step by Step for Perfect Texture)
Now, slowly add the dry mixture to your wet ingredients. Do this step by step—add a little at a time, mixing gently between each addition. This prevents overmixing, which can make cookies dense instead of soft and chewy. Use a spatula or low-speed mixer until everything just comes together. You’ll notice the dough thickening and deepening in color. It should feel soft, a little sticky, and completely irresistible (resist the urge to eat it all—raw eggs, remember?).
Step 5: Chill the Dough (The Secret to Perfect Crinkles)
Cover your bowl with plastic wrap and refrigerate the dough for at least 30 minutes. Chilling is more than a waiting game—it’s a science-backed trick that solidifies the butter, making the cookies hold their shape while baking. Without it, you’d end up with flat cookies instead of those gorgeous crinkles. If you’re short on time, pop it in the freezer for 15 minutes. Want to prep ahead? You can chill the dough overnight—just let it sit at room temperature for 10 minutes before rolling.
Step 6: Shape and Coat with Powdered Sugar
Once the dough is chilled, scoop out 1-inch balls using a cookie scoop or spoon. Roll each ball between your palms to make it smooth, then drop it into a bowl of powdered sugar. Roll generously—like you’re tucking it into a powdered sugar blanket. This coating is what creates that stunning crinkle effect. As the cookies bake, they expand and crack, revealing the red velvet beneath. If you love this kind of dramatic cookie reveal, you might also enjoy our Easy Pecan Pie Cookies—they’re another fun, photogenic treat.
Step 7: Bake Until Just Set
Place the dough balls on your prepared baking sheets about 2 inches apart—these cookies like a little breathing room. Bake for 10–12 minutes. The cookies should look cracked on top but still soft in the center. Remember, cookies continue to bake on the pan even after coming out of the oven, so don’t wait for them to look fully firm. This step by step baking timing ensures you get that chewy center every time. For a deeper dive into baking perfection, check out our tips from Snickerdoodle Cobbler, where we talk about the sweet spot between “just baked” and “overdone.”
Step 8: Cool and Enjoy
Let the cookies cool on the baking sheet for 5 minutes before transferring them to a wire rack. This helps them firm up slightly while staying soft inside. Once cooled, you’ll see that classic snow-dusted look—crispy edges, tender middles, and that irresistible red velvet aroma. Try not to eat them all in one sitting (no judgment if you do). They pair perfectly with a cold glass of milk or a mug of coffee by the fire.
Step 9: Optional Add-Ons for Extra Wow
Feeling fancy? Turn your cookies into Red Velvet Sandwich Cookies by spreading cream cheese frosting between two of them. Or sprinkle a little extra powdered sugar right before serving for that bakery-perfect finish. You can even drizzle white chocolate on top for added flair—similar to the sweet touch in our Cranberry Goat Cheese Log. These small, creative touches make a big impression when gifting or entertaining.
Bonus Baking Tip
If you’re new to baking and want to master the art of cookie dough consistency, check out our Creamy Chicken Pot Pie Orzo recipe—not because it’s dessert, but because it breaks down kitchen timing and prep efficiency step by step. Once you get a rhythm going, you’ll be amazed at how much smoother your baking sessions become.
What to Serve with Red Velvet Crinkle Cookie
These cookies pair perfectly with a tall glass of milk or a steaming mug of cocoa. For a more grown-up twist, serve them with coffee or a scoop of vanilla ice cream. Around the holidays, they look stunning on a dessert board alongside Cranberry Goat Cheese Log or Turkey Cranberry Crescent Ring. You can even sandwich two cookies with cream cheese frosting for an extra decadent treat. If you’re gifting them, stack a few in a mason jar with a festive ribbon—it’s a simple, heartfelt homemade present that tastes as good as it looks.
Key Tips for Making Red Velvet Crinkle Cookie
- Chill the dough—seriously, don’t skip it. Cold dough = better crinkles.
- Use quality cocoa powder for that rich chocolatey flavor (brands like King Arthur Baking are great).
- Don’t overbake. They should look slightly underdone when you pull them out.
- Coat generously in powdered sugar—if you skimp, you’ll lose that pretty snow effect.
- Experiment with add-ins like mini chocolate chips or white chocolate chunks for fun variations.
Storage and Reheating Tips Red Velvet Crinkle Cookie
Store these cookies in an airtight container at room temperature for up to five days. To keep them soft, toss a slice of bread in the container—the cookies will absorb moisture from it (old bakery trick!). For longer storage, freeze the baked cookies for up to three months. To reheat, microwave for about 10 seconds or pop them in a 300°F oven for a few minutes. You can also freeze the unbaked dough balls, roll them in sugar after thawing, and bake fresh whenever your sweet tooth calls.
FAQs
Can I use natural food coloring? Yes! Beet powder or gel-based natural colors work fine—just note the shade might be more muted.
Can I make them gluten-free? Absolutely. Use a cup-for-cup gluten-free flour blend.
Why didn’t my cookies crinkle? Your dough might’ve been too warm. Chill longer next time.
Can I add frosting? Totally. A swirl of cream cheese frosting turns these into mini red velvet whoopie pies!
Final Thoughts
The Red Velvet Crinkle Cookie isn’t just a dessert—it’s a little bite of joy. From their vibrant color to their melt-in-your-mouth texture, these cookies bring cheer to any day (holiday or not). Whether you’re baking with your kids, hosting friends, or just need a pick-me-up, these cookies remind you that a little sweetness goes a long way. So preheat that oven, grab your favorite playlist, and bake something worth sharing—because good cookies make good memories.
Visit our Pinterest for regular slow cooker recipe updates, or join our Facebook discussions where cooking fans exchange their favorite hearty meal ideas.
Print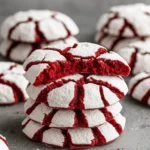
Red Velvet Crinkle Cookie That Everyone Will Love
- Prep Time: 45 minutes
- Cook Time: 10 minutes
- Total Time: 55 minutes
- Yield: 12 servings 1x
- Category: Cake Ideas
- Method: Baking
- Cuisine: American
- Diet: Vegetarian
Description
Soft, fudgy red velvet crinkle cookies coated in powdered sugar with a signature crackled finish. A festive treat for any occasion.
Ingredients
- 1 1/2 cups all-purpose flour
- 1/2 cup unsweetened cocoa powder
- 1 tsp baking powder
- 1/4 tsp salt
- 1/2 cup unsalted butter, softened
- 1 cup granulated sugar
- 2 large eggs
- 1 tsp vanilla extract
- 1 tbsp red food coloring
- 1/2 cup powdered sugar, for rolling
Instructions
1. Preheat your oven to 350°F (175°C). Line two baking sheets with parchment paper and set them aside.
2. In a medium bowl, whisk together the dry ingredients: flour, cocoa powder, baking powder, and salt. This will be your dry mixture.
3. In a large mixing bowl, beat the butter and sugar together until light and fluffy. This usually takes about 2-3 minutes. Add in the eggs, one at a time, beating well after each addition. Stir in the vanilla extract and red food coloring, mixing until evenly combined.
4. Gradually add the dry mixture to the wet ingredients, mixing just until combined. The dough will be soft and a little sticky—that’s exactly what you want.
5. Cover the dough and refrigerate for at least 30 minutes. Chilling the dough makes it easier to handle and helps the cookies maintain their shape.
6. Once chilled, scoop the dough into 1-inch balls. Roll each ball in powdered sugar, ensuring it’s well-coated. Place the dough balls on the prepared baking sheets, spacing them about 2 inches apart.
7. Bake for 10–12 minutes until the cookies are set but still soft in the center. They should have a beautiful crackled appearance.
8. Let the cookies cool on the baking sheet for a few minutes before transferring them to a wire rack to cool completely.
Notes
For a richer red hue, use gel food coloring instead of liquid. Don’t skip the chilling step—it’s key to achieving that perfect crinkle top. These cookies freeze well; store in a single layer or with parchment between layers in an airtight container.
Nutrition
- Serving Size: 1 cookie
- Calories: 130
- Sugar: 12g
- Sodium: 50mg
- Fat: 6g
- Saturated Fat: 4g
- Unsaturated Fat: 1.5g
- Trans Fat: 0g
- Carbohydrates: 17g
- Fiber: 1g
- Protein: 2g
- Cholesterol: 30mg