Cheeseburger Sliders are the ultimate comfort food for busy nights, backyard parties, or when you just want that classic burger taste without firing up the grill. These mini sandwiches are juicy, cheesy, and downright irresistible—basically all the things you love about burgers packed into soft, buttery dinner rolls. Plus, they’re a total lifesaver when you need something fast; we’re talking about a 30-minute meal that feeds a crowd and reheats like a dream.
Imagine melty cheddar hugging perfectly seasoned ground beef, tucked inside warm golden rolls—yep, it’s as good as it sounds. Whether you’re cooking for your family, prepping for game day, or hosting a casual dinner, Cheeseburger Sliders are the go-to recipe that’ll make everyone ask for seconds.
Table of Contents
What is Cheeseburger Sliders?
Cheeseburger Sliders are mini-sized burgers made by baking ground beef and cheese between layers of soft dinner rolls. Think of them as the bite-sized cousins of your favorite diner burger—minus the mess and the long cook time. They’re baked in one big batch and then sliced into individual sliders, making them perfect for parties or busy weeknights. The beauty of this recipe is that you get all the flavors of a juicy burger (beef, cheese, onion, and buttery buns) but with minimal effort.
These sliders are also fantastic for meal prep since they reheat beautifully. Pair them with some crispy oven fries or a fresh salad, and you’ve got yourself a winning dinner. Fun, fuss-free, and family-approved, Cheeseburger Sliders are proof that you don’t need a grill to enjoy the magic of a good burger.
Reasons to Try Cheeseburger Sliders
If you’re short on time but crave big flavor, Cheeseburger Sliders are your new best friend. First off, they’re fast—just 30 minutes from skillet to table. Second, they’re incredibly versatile: serve them for lunch, dinner, or even as appetizers at your next get-together. They also make picky eaters happy because, well, who doesn’t love a cheesy burger? The make-ahead option is another game changer; you can prep the beef mixture earlier and bake when ready.
And unlike traditional burgers, there’s no flipping or grease splatter involved. If you enjoy recipes like our Patty Melts with Secret Sauce or Cheesy Beef Tortellini Bake, you’ll love how simple and satisfying these sliders are. They’re a crowd-pleaser, wallet-friendly, and guaranteed to disappear faster than you can say “Who wants seconds?”
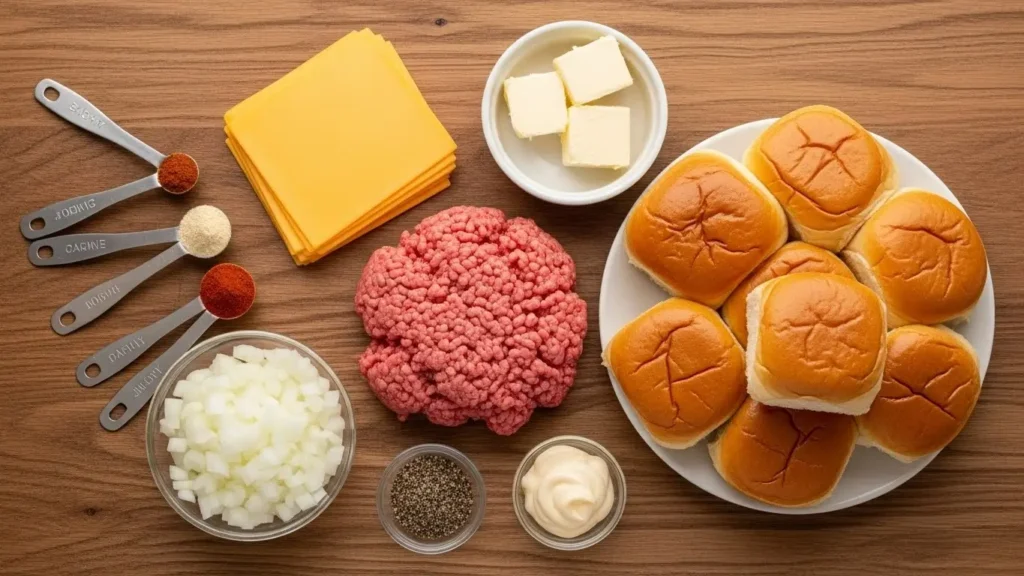
Ingredients Needed to Make Cheeseburger Sliders
- 2 lb lean ground beef (90/10 or 93/7)
- ½ Tbsp olive oil
- 1 tsp salt
- 1 tsp black pepper
- 1 tsp garlic powder
- ½ large yellow onion, finely diced
- ¼ cup mayonnaise
- 8 slices medium cheddar cheese
- 6 oz shredded medium cheddar cheese
- 24 dinner rolls (2 packs of 12)
- 2 Tbsp unsalted butter, melted, plus extra for greasing
- 1 Tbsp sesame seeds
Instructions to Make Cheeseburger Sliders (Step by Step Guide)
Alright, let’s get into the delicious details! Making Cheeseburger Sliders is simple and satisfying when you follow this step-by-step guide. Each part of the process builds flavor and texture, turning ordinary ingredients into something you’ll crave again and again.
Step 1: Preheat and Prep Like a Pro
Start by preheating your oven to 350°F. While it warms up, grab a rimmed baking sheet and lightly butter the bottom. This little trick adds that irresistible buttery flavor and prevents sticking—because no one wants to lose a roll to the pan! You can even line it with parchment paper for extra easy cleanup.
If you love efficient kitchen hacks, check out our Crockpot Chicken and Potatoes recipe for more simple prep ideas that save time (and sanity) on busy nights.
Step 2: Sauté the Onions and Brown the Beef
Now, place a large skillet over medium-high heat and drizzle in the olive oil. Once it shimmers, toss in your finely diced onions and let them sauté for 2–3 minutes until fragrant and slightly golden. This step adds a sweet, savory depth to your sliders that makes all the difference.
Next, crumble in the ground beef, seasoning it right away with salt, black pepper, and garlic powder. Break it apart with your spatula as it cooks—think small, even crumbles so every bite is packed with flavor. Cook until no pink remains, about 6–8 minutes.
If you’ve ever made our Hearty Ground Beef Burrito Bowl, you already know how much a good seasoning balance can take ground beef from “meh” to mouthwatering.
Step 3: Drain and Add Creaminess
Once the beef is cooked through, tilt the skillet slightly to drain off excess fat. This keeps your sliders from turning soggy later. Then, while the meat is still warm, stir in ¼ cup of mayonnaise. Sounds unusual? Trust the process. The mayo adds a subtle creaminess that locks in moisture and gives every bite that “how is this so juicy?” moment.
If you prefer a lighter option, you can swap in Greek yogurt or light mayo—check out our Healthy Ground Turkey Teriyaki Rice Bowl for more inspiration on healthy swaps that still taste incredible.
Step 4: Build Your Slider Layers
Slice your dinner rolls in half horizontally (keeping each pack intact so you have a single top and bottom “slab”). Place the bottom half on the buttered baking sheet. Layer on your sliced cheddar cheese, covering every inch—no bare spots allowed!
Spread the ground beef mixture evenly over the cheese layer. Use the back of your spatula to smooth and press it down into the corners, forming a flat, even layer. Now sprinkle the shredded cheddar over the top, creating that gooey, cheesy magic we all dream about.
This step-by-step layering ensures every slider is perfectly balanced—cheese on both sides of the beef locks in moisture and keeps the rolls from getting soggy.
Want another cheesy favorite? Try our Cheesy Beef Tortellini Bake next—it’s just as creamy and comforting!
Step 5: Top, Butter, and Bake
Place the top half of the rolls gently over your slider masterpiece, lining them up neatly. Now, brush the tops generously with melted butter (this is where the golden magic happens). Don’t hold back—the more, the better! Sprinkle sesame seeds on top for that bakery-style finish.
Bake your sliders in the preheated oven for 12–15 minutes, or until the tops turn golden brown and the cheese underneath is melted to perfection. When you pull the tray out, your kitchen will smell like heaven—seriously, everyone will come running.
If you love quick oven meals, you’ll also enjoy our Crockpot Chicken Enchilada Casserole for another easy dinner with minimal cleanup.
Step 6: Slice and Serve
Let the sliders rest for a couple of minutes before slicing. Use a sharp knife to cut between each roll—this keeps everything neat and tidy (and saves you from a cheesy mess). Serve warm with your favorite dipping sauces, like ketchup, BBQ sauce, or even chipotle mayo for a little kick.
If you want to pair your sliders with something fresh, our Zesty Southwest Chicken Salad adds a bright, flavorful balance to your meal.
Step 7: Step by Step Cleanup and Storage Tips
Once dinner’s done, cleanup is a breeze thanks to the buttered baking sheet. Leftovers? Store them in an airtight container in the fridge for up to 3 days. Reheat them in the oven at 350°F for 10 minutes or pop them in the microwave for 30 seconds for a quick lunch. For freezer-friendly meal prep, wrap individual sliders in foil and freeze for up to 2 months—perfect for grab-and-go lunches or easy weeknight dinners.
By following this step-by-step Cheeseburger Sliders guide, you’ll end up with perfectly cooked, cheesy, golden sliders every single time. Each step is designed to build flavor, texture, and that crave-worthy burger satisfaction—without the grill.
If you’re looking for more quick, comforting meals like this one, don’t miss our Tater Tot Casserole with Ground Beef or Garlic Butter Steak Bites and Potatoes—both guaranteed to hit the same cozy, all-American notes.
What to Serve with Cheeseburger Sliders
These sliders play well with just about anything. Keep it classic with crispy fries or Crispy Oven-Baked Sweet Potato Fries, or lighten things up with a fresh side salad. For a hearty dinner, serve them with Zesty Southwest Chicken Salad or a big batch of Slow Cooker Chicken and Potatoes with Green Beans. Want something indulgent? Pair them with mac and cheese or a creamy coleslaw. If you’re serving these for a party, throw in a few finger foods like Red Velvet Truffles or Strawberry No-Bake Cake Balls for dessert.
Key Tips for Making Cheeseburger Sliders
Use lean beef to avoid excess grease but still get juicy flavor. Don’t skip the mayo—it makes the filling creamy and helps it hold together. If you like a bit of spice, toss in diced jalapeños or pepper jack cheese. You can also swap dinner rolls for Hawaiian rolls for a sweet-savory twist. Brush those tops generously with butter for that golden glow. And if you’re making them for a crowd, double the recipe—they go fast! For more clever dinner ideas, see our Ground Beef and Brussels Sprouts recipe for another quick weeknight win.
Storage and Reheating Tips for Cheeseburger Sliders
Once cooled, store sliders in an airtight container in the fridge for up to 3 days. To reheat, place them in a 350°F oven for about 10 minutes, or microwave for 30 seconds if you’re in a rush. They also freeze beautifully—wrap tightly in foil, freeze up to 2 months, and thaw overnight in the fridge before reheating. These sliders are great for meal prep or lunchboxes, so don’t hesitate to make extra.
FAQs
Can I use different cheese? Yes, American, Swiss, or pepper jack work great.
Can I make these ahead? Absolutely! Assemble, cover with foil, and refrigerate. Bake when ready.
Can I use turkey or chicken? Definitely—just adjust the seasoning to keep the flavor bold.
Do they get soggy? Nope! The buttered pan and toasted buns keep them perfectly crisp.
Final Thoughts
Cheeseburger Sliders are everything you love about burgers—juicy meat, melted cheese, buttery buns—made easier and faster. They’re a go-to for family dinners, potlucks, or late-night cravings. Whether you’re feeding kids, friends, or just yourself on a busy weeknight, this recipe delivers major flavor with minimal fuss. For more comforting, crowd-pleasing recipes, head over to We Enjoy Meals and discover other favorites like Tater Tot Casserole with Ground Beef or Garlic Butter Steak Bites and Potatoes.
Visit our Pinterest for regular slow cooker recipe updates, or join our Facebook discussions where cooking fans exchange their favorite hearty meal ideas.
Print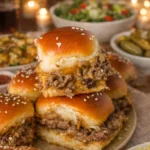
Cheeseburger Sliders: Easy 30-Minute Family Favorite
- Prep Time: 8 minutes
- Cook Time: 22 minutes
- Total Time: 30 minutes
- Yield: 24 sliders 1x
- Category: Main Course
- Method: Baking
- Cuisine: American
Description
Cheeseburger Sliders are juicy, cheesy and beefy—everything we love about classic burgers! These sliders are quick and easy, plus they are make-ahead and reheat really well.
Ingredients
- 2 lb lean ground beef (90/10 or 93/7 fat content)
- 1/2 Tbsp olive oil
- 1 tsp salt
- 1 tsp black pepper
- 1 tsp garlic powder
- 1/2 large yellow onion, finely diced
- 1/4 cup mayonnaise
- 8 slices medium cheddar cheese
- 6 oz medium cheddar, shredded (or use more sliced cheese)
- 24 dinner rolls (or use 2 packs of 12)
- 2 Tbsp unsalted butter, melted, plus more to grease baking sheet
- 1 Tbsp sesame seeds
Instructions
1. Preheat oven to 350˚F. Butter the bottom of a rimmed baking sheet.
2. Place a large skillet over medium/high heat with 1/2 Tbsp olive oil. Add diced onion then 2 lbs ground beef and break up with a spatula. Season with salt, black pepper, and garlic powder. Saute over medium/high heat, breaking up the beef, and cook just until done. Remove from heat.
3. Tilt skillet to spoon off and discard excess fat. Stir 1/4 cup mayo into the ground beef mixture.
4. Cut buns in half. Place bottom halves of dinner rolls on buttered baking sheet and line with sliced cheddar cheese.
5. Spread ground beef mixture evenly over the cheese layer, using the back of a spatula to square off the edges.
6. Top the beef with shredded cheddar cheese.
7. Place the top buns, cut-side down, over the beef. Brush tops with 2 Tbsp melted butter and sprinkle with sesame seeds.
8. Bake at 350˚F for 12–15 minutes or until cheese is melted and tops are golden brown.
9. Serve warm or store and reheat for later.
Notes
These sliders are perfect for parties, game days, or quick dinners.
Can be assembled ahead of time and baked just before serving.
Feel free to use different types of cheese based on your preference.
Serve with pickles, ketchup, or dipping sauces for extra flavor.
Nutrition
- Serving Size: 1 slider
- Calories: 266
- Fat: 13g
- Carbohydrates: 21g
- Protein: 16g