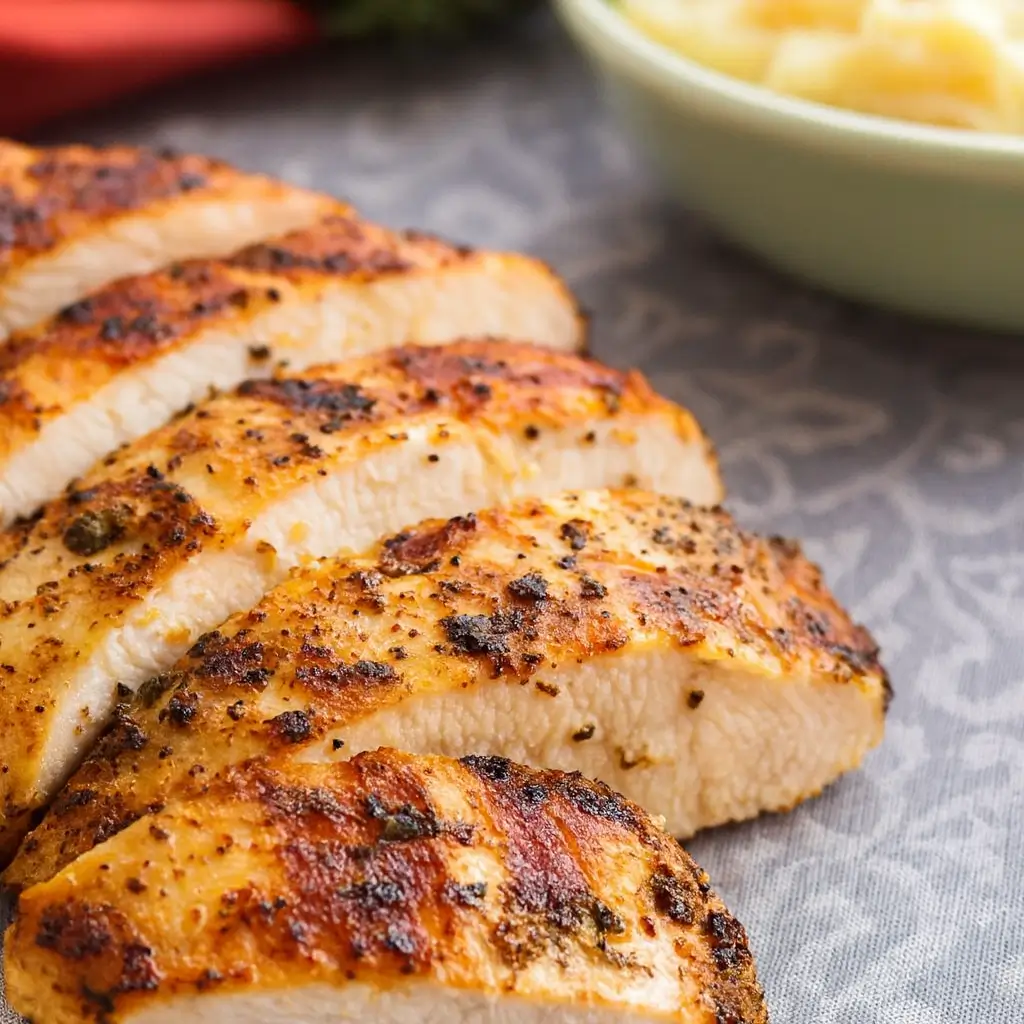
Air Fryer Grilled Chicken is about to become your go-to dinner rescue — especially for those nights when you’re starving but the thought of standing over a grill feels like climbing Mount Everest. This recipe delivers the same juicy, smoky flavor you love from outdoor grilling, only faster, cleaner, and way less drama. The magic happens in just 20 minutes, and the result? Perfectly seasoned, golden chicken that tastes like summer no matter the season. Whether you’re meal-prepping for the week or whipping up a quick dinner for picky eaters, this Air Fryer Grilled Chicken is about to be your new kitchen bestie.
Table of Contents
What is Air Fryer Grilled Chicken?
Air Fryer Grilled Chicken takes everything you adore about classic grilled chicken — that golden-brown crust, smoky flavor, and juicy tenderness — and makes it ridiculously simple. Instead of dragging out the grill or smoking up your kitchen, your air fryer does the heavy lifting. The circulating hot air cooks each chicken breast evenly, sealing in moisture while crisping the outside. With a quick mix of olive oil, paprika, garlic powder, onion powder, and salt, the chicken turns flavorful without fuss. The best part? It’s healthy, low in oil, and perfect for busy weeknights or anyone trying to keep dinner light and satisfying.
Reasons to Try Air Fryer Grilled Chicken
If convenience had a flavor, it would taste like Air Fryer Grilled Chicken. For starters, it’s done in under 25 minutes — prep and cook included. No grill, no pan, no mess. Just toss, air fry, and dinner’s ready. Plus, it’s incredibly versatile. You can serve it with veggies, pasta, or slice it up for salads and sandwiches. It’s also foolproof — the air fryer keeps the chicken juicy, so even if you’ve burned a few dinners before, this recipe has your back. And let’s not ignore how much healthier it is compared to traditional fried options. Fewer calories, less oil, but full-on flavor? Yes, please.
Ingredients Needed to Make Air Fryer Grilled Chicken
- 1½ lbs chicken breast portions (about four 4-oz pieces)
- 1 tbsp olive oil
- ¾ tsp garlic powder
- ½ tsp onion powder
- 1¾ tsp salt
- 1¼ tsp paprika

Instructions to Make Air Fryer Grilled Chicken (Step by Step)
Ready to make juicy, golden perfection? Here’s your step-by-step guide to cooking Air Fryer Grilled Chicken that’s crisp on the outside, tender inside, and bursting with flavor. Whether you’re new to air fryers or already obsessed, these detailed steps will walk you through everything from prep to plating — no guesswork required.
Step 1: Pat the Chicken Dry for Better Texture
Let’s start strong. Take a few paper towels and pat your chicken breasts dry on both sides. Removing that excess moisture helps create a gorgeous, lightly crisped crust once it hits the air fryer. Think of it as setting the stage for flavor to stick and sizzle beautifully.
Pro tip: If your chicken breasts are thick, slice them horizontally into thinner cutlets. This helps them cook evenly and stay juicy all the way through. (You can check out my guide on Balsamic Baked Chicken Breast for another example of why uniform thickness makes such a big difference.)
Step 2: Mix Your Seasoning Blend Like a Pro
In a small bowl, mix together your garlic powder, onion powder, paprika, and salt. This simple blend might look basic, but don’t be fooled — it’s the secret behind that smoky, savory flavor that keeps you coming back for more.
Want to switch things up? You can swap paprika for smoked paprika for a deeper flavor or add a pinch of cayenne for heat. For more inspiration, peek at my Garlic Butter Chicken with Corn and Zucchini — it’s a masterclass in how spices turn ordinary chicken into something spectacular.
Step 3: Coat the Chicken Step by Step for Even Flavor
Drizzle your olive oil over the chicken breasts and toss them gently until each piece looks glossy and evenly coated. The olive oil not only helps your seasoning stick but also gives that beautiful golden-brown finish once cooked.
Next, sprinkle your seasoning mix over the chicken. Use your hands to rub it in thoroughly, covering every side. Don’t be shy — this is where the magic happens. Make sure each bite will have that irresistible balance of garlic, salt, and smoky paprika.
Step 4: Prepare the Air Fryer Like a Mini Grill
Before cooking, brush or lightly spray the bottom of your air fryer basket with olive oil. This simple step keeps the chicken from sticking and helps it brown beautifully. Think of your air fryer as your indoor grill — it just happens to fit on your counter.
If you’re using a basket-style model, preheat it for about 2 minutes at 380°F. Preheating ensures that your chicken starts cooking the moment it hits the basket, locking in the juices and flavor. (If you’re new to using air fryers, my post on Crockpot Greek Chicken shares a few handy preparation tips that also apply here.)
Step 5: Arrange and Air Fry — The Main Step by Step Cooking Process
Place the chicken breasts in the basket in a single layer, leaving a little space between each piece. Overcrowding prevents the air from circulating properly, which means uneven cooking — and nobody wants that.
Cook the chicken at 380°F for 10 minutes, then carefully flip each piece using tongs. Flipping halfway ensures both sides cook evenly and develop that irresistible golden color. Continue cooking for another 8–10 minutes, depending on the thickness of your chicken.
Step 6: Check for Doneness (Don’t Skip This Step!)
When the timer dings, grab your meat thermometer and check the internal temperature at the thickest part of the breast. You’re looking for 165°F — that’s your golden number for juicy, safe-to-eat chicken.
If your pieces need a little more time, return them to the air fryer and cook in 3-minute intervals, checking after each round. Air fryers can vary slightly, so these short bursts prevent overcooking and drying out. For more temperature and timing hacks, see my tips in Lemon Chicken Romano.
Step 7: Rest Before Serving — The Secret Step Most People Skip
Once cooked, remove the chicken from the air fryer and place it on a plate or cutting board. Now, take a deep breath and let it rest for 5–10 minutes. This step might feel optional, but it’s not — resting allows the juices to redistribute throughout the chicken, giving you that tender, melt-in-your-mouth texture every time.
If you slice too soon, those flavorful juices will spill out, leaving the meat dry. Trust me, patience here pays off.
Step 8: Slice, Serve, and Enjoy the Results
Slice your Air Fryer Grilled Chicken against the grain for the most tender bites. Serve it warm with roasted veggies, over a salad, or tucked into a wrap. You can even meal prep it for the week — it keeps beautifully in the fridge and pairs well with nearly any side.
For flavor pairing ideas, you’ll love my Crockpot Chicken Tortilla Soup or Mediterranean Lemon Chicken Soup. Both complement the smoky, juicy flavors of this air-fried favorite perfectly.
Step by Step Wrap-Up
And that’s it — a full step-by-step guide to making Air Fryer Grilled Chicken that’s quick, healthy, and totally foolproof. From seasoning to resting, every step builds flavor and texture, giving you that perfect “grilled” taste without ever firing up an outdoor grill. With this simple process, your air fryer becomes your new favorite kitchen hero.
What to Serve with Air Fryer Grilled Chicken
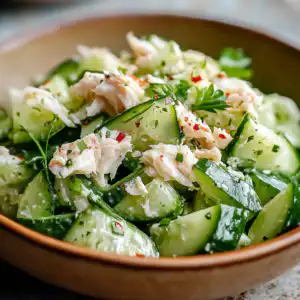
This dish pairs beautifully with nearly anything. Serve it over a bed of greens for a light lunch, or alongside roasted veggies and mashed potatoes for a comforting dinner. It’s fantastic chopped into pasta or wraps, too. If you want a cozy, hearty side, check out our Crockpot Chicken Tortilla Soup — the combination hits every note of flavor and texture. For something lighter, a citrusy cucumber salad or grilled corn on the cob makes a refreshing contrast to the smoky, savory chicken.
Key Tips for Making Air Fryer Grilled Chicken
- Don’t skip drying the chicken — moisture prevents browning.
- Use a meat thermometer! It’s your secret to perfectly cooked chicken every time.
- Preheat your air fryer for a minute or two for an even cook.
- If your chicken breasts are thick, slice them horizontally for even cooking.
- Let the chicken rest after cooking — this step keeps it juicy.
- Want more flavor? Add a squeeze of lemon juice or a sprinkle of fresh herbs before serving.
For more helpful kitchen tricks, see our post on Lemon Chicken Romano.
Storage and Reheating Tips for Air Fryer Grilled Chicken
Store leftover Air Fryer Grilled Chicken in an airtight container in the fridge for up to 4 days. To reheat, skip the microwave if you can — it tends to dry out chicken. Instead, pop it back in the air fryer at 350°F for 3–4 minutes until warmed through. You can also slice it and toss it into soups, salads, or wraps for an easy next-day meal. If you want to freeze it, wrap each piece individually in foil or plastic wrap, then place them in a freezer-safe bag. It’ll keep for up to 3 months. Thaw overnight in the fridge before reheating.
FAQs
Can I use frozen chicken?
Yes, but increase the cook time by 5–7 minutes and check the internal temperature.
Do I need to marinate the chicken?
Not at all! The seasoning blend gives plenty of flavor, but if you like marinades, go for it — just pat dry before cooking.
Can I use chicken thighs instead?
Absolutely. Boneless thighs work great; just adjust the time to about 12–14 minutes per side.
What air fryer works best?
Any standard air fryer works, but basket-style models give the best airflow and crispness.
Final Thoughts
Air Fryer Grilled Chicken is the kind of meal that saves the day when time’s short and hunger’s high. It’s fast, flavorful, and feels like you put in way more effort than you actually did. Whether you’re feeding the family, meal prepping for the week, or just craving something fresh and simple, this recipe hits the mark. So plug in that air fryer, grab your seasonings, and get ready for juicy, golden chicken in no time.
Visit our Pinterest for regular slow cooker recipe updates, or join our Facebook discussions where cooking fans exchange their favorite hearty meal ideas.
Print
Air Fryer Grilled Chicken: Quick, Juicy, and Flavor-Packed
- Prep Time: 10 minutes
- Cook Time: 10 minutes
- Total Time: 20 minutes
- Yield: 4 servings 1x
- Category: Main
- Method: Air Frying
- Cuisine: American
Description
This Air Fryer Grilled Chicken is quick, juicy, and bursting with flavor thanks to a simple blend of seasonings. It’s perfect for busy weeknights and ready in just 20 minutes. Tender, healthy, and great for meal prep or pairing with your favorite sides.
Ingredients
- 1½ lbs Springer Mountain Farms 4 oz chicken breast portions
- 1 tbsp olive oil
- ¾ tsp garlic powder
- ½ tsp onion powder
- 1¾ tsp salt
- 1¼ tsp paprika
Instructions
1. Pat the chicken breasts dry with paper towels and place them in a large bowl.
2. In a small bowl, combine garlic powder, onion powder, salt, and paprika.
3. Add the olive oil to the chicken and toss until evenly coated. Sprinkle the seasoning mix over the chicken and rub it in well to cover all sides.
4. Brush the bottom of the air fryer basket with olive oil to prevent sticking.
5. Place the chicken breasts in the basket in a single layer, leaving space between each piece.
6. Air fry at 380°F for 10 minutes. Flip the chicken and cook for another 10 minutes.
7. Use a meat thermometer to check the internal temperature. Remove any chicken that reaches 165°F. Return any undercooked pieces to the air fryer and continue cooking in 3-minute intervals until fully cooked.
8. Let the chicken rest for 5–10 minutes before slicing or serving.
Notes
For best results, use chicken breasts of uniform thickness to ensure even cooking.
Chicken can be marinated ahead of time in the seasoning mix and refrigerated for up to 24 hours.
Store leftovers in the refrigerator for up to 3 days. Reheat in the air fryer at 350°F for 3–5 minutes.
Nutrition
- Serving Size: 1 chicken breast
- Calories: 210
- Sugar: 0
- Sodium: 950
- Fat: 8
- Saturated Fat: 2
- Unsaturated Fat: 5
- Trans Fat: 0
- Carbohydrates: 1
- Fiber: 0
- Protein: 32
- Cholesterol: 95