Peanut Butter Truffles are the kind of treat that makes you feel like a dessert genius without breaking a sweat. They’re smooth, creamy, covered in chocolate, and absolutely irresistible—like little bites of peanut butter heaven. Whether you’re making them for game day, a holiday party, or a late-night craving, these truffles are simple enough for a weekday but fancy enough to impress. The best part? You don’t even have to turn on the oven.
Table of Contents
What is Peanut Butter Truffles?
Peanut Butter Truffles are bite-sized confections made from a creamy peanut butter base that’s sweetened and then dipped in rich melted chocolate. Think of them as the perfect mix between a Reese’s cup and a truffle—soft, salty-sweet, and melt-in-your-mouth good. The process is easy: whip up a peanut butter filling, roll it into shapes, chill, and dip. Some people even shape them like footballs for parties! They’re a classic crowd-pleaser that stores beautifully, travels well, and satisfies every chocolate-peanut butter lover you know.
Reasons to Try Peanut Butter Truffles
There are plenty of reasons these Peanut Butter Truffles deserve a permanent spot in your recipe rotation. First, they’re a no-bake dessert—no oven, no stress. They’re also totally customizable; dip them in milk, dark, or white chocolate depending on your mood (or what’s in your pantry). They’re great for gifting, freezing, or sneaking one by one when nobody’s looking. And honestly, who doesn’t love peanut butter and chocolate together? Plus, with ingredients you probably already have at home, these truffles feel a little fancy without being fussy.
Ingredients Needed to Make Peanut Butter Truffles
- 1 cup creamy peanut butter (not natural)
- 5 tablespoons salted butter, melted
- 1 tablespoon heavy whipping cream
- 1 tablespoon vanilla extract
- 1½ cups powdered sugar
- 1 cup milk chocolate chips or melting chocolate (Ghirardelli wafers are perfect)
- ¼ cup white chocolate melting wafers (for drizzling or decorating)

Instructions to Make Peanut Butter Truffles
When it comes to creating these sweet, chocolate-dipped delights, the Step by Step process is surprisingly simple and incredibly satisfying. You don’t need fancy tools or culinary experience—just a few basic ingredients, a mixing bowl, and a love for peanut butter and chocolate. Let’s dive into the full Step by Step guide to making perfect Peanut Butter Truffles that’ll have everyone asking for seconds.
Step 1: Combine Your Base Ingredients
Start this Step by Step process by grabbing a large mixing bowl. Add 1 cup of creamy peanut butter (make sure it’s not natural—it needs to be thick and smooth), 5 tablespoons of melted salted butter, 1 tablespoon of heavy whipping cream, and 1 tablespoon of vanilla extract. Using a hand mixer or sturdy spatula, blend everything together until it’s completely smooth and creamy. The mixture should look rich and slightly glossy—like a soft peanut butter frosting. This base gives your truffles their signature melt-in-your-mouth texture.
Pro Tip: If your mixture feels a bit too soft, pop it in the fridge for 10–15 minutes before the next step. For more helpful prep tricks, check out our Strawberry No-Bake Cake Balls—they follow a similar chilling process that helps shape the dough beautifully.
Step 2: Add Powdered Sugar for Structure
Now, let’s build structure into that peanut butter perfection. Slowly mix in 1½ cups of powdered sugar, about ½ cup at a time. Continue stirring (or mixing) until the sugar fully blends in. The dough will start to pull away from the sides of the bowl and become thicker—almost like cookie dough. That’s exactly what you want! The goal is a consistency firm enough to hold a ball shape but still soft enough to roll easily between your hands.
If you notice the dough is too stiff, add another teaspoon of heavy cream. Too sticky? Add a tablespoon of powdered sugar. This Step by Step adjustment helps you find that perfect balance.
Step 3: Chill the Dough
Once your truffle dough is ready, it’s time for a well-earned rest—both for you and your mixture. Cover the bowl tightly with plastic wrap and place it in the refrigerator (or freezer) for at least one hour. This chilling Step by Step process is essential; it firms up the dough so you can easily roll and dip it later without everything falling apart.
During this waiting time, you can prepare your workspace. Line a baking sheet with parchment paper and make space in the fridge for setting your truffles after dipping. If you love easy prep ideas like this, you’ll also enjoy our Red Velvet Truffles, which use the same chill-and-dip technique for flawless results.
Step 4: Shape the Peanut Butter Truffles
After chilling, remove your bowl from the fridge. Scoop about one tablespoon of dough at a time and roll it between your palms into smooth 1-inch balls. To make these game-day ready, gently press the sides of each ball to form little football shapes. This Step by Step shaping process is oddly satisfying—kind of like edible arts and crafts!
Place each shaped truffle onto the parchment-lined tray. If your kitchen is warm, pop the tray back into the fridge for 10 minutes to help them hold their shape before dipping.
Step 5: Melt the Chocolate
Now for the fun part—chocolate time! Place 1 cup of milk chocolate chips or melting wafers into a microwave-safe bowl. Heat in 20-second intervals, stirring each time, until the chocolate is silky smooth and lump-free. Be careful not to overheat it, as chocolate burns quickly.
If you’d rather skip microwaving, you can use a double boiler. For more guidance on melting techniques, our Chocolate Covered Strawberries post shares a foolproof way to keep chocolate glossy and perfect for dipping.
Step 6: Dip the Truffles
Using a toothpick or fork, gently lift each chilled peanut butter shape and dip it into the melted chocolate. Swirl it around until it’s completely coated, then lift it out and let the excess drip off. This Step by Step dipping process can get a little messy, but that’s part of the fun.
Place each coated truffle onto your parchment-lined tray. If any small holes remain from the toothpick, don’t worry—the next step will cover them up beautifully. Once all truffles are coated, refrigerate them for about 15–20 minutes to let the chocolate harden.
Step 7: Decorate with White Chocolate
Melt ¼ cup of white chocolate wafers the same way you did the milk chocolate. Pour the melted white chocolate into a small plastic bag, snip the corner, and pipe decorative lines or drizzle patterns over each truffle. If you shaped them like footballs, use the white chocolate to create “laces.”
This final Step by Step decoration turns simple truffles into showstoppers. Let them set for another 10 minutes in the fridge before serving—or, if you can’t resist, grab one right away (we won’t tell).
Step 8: Serve and Enjoy
Congratulations, you’ve completed the Step by Step process for making Peanut Butter Truffles! Serve them on a pretty platter, wrap them up as gifts, or store them in an airtight container in the fridge. They’re delicious chilled or slightly softened at room temperature.
If you enjoyed this recipe, try pairing them with something fruity like our Strawberry Jello Pie or go for another no-bake classic like Valentine’s Day Fudge. Both make perfect companions to these rich, peanut-buttery bites.
What to Serve with Peanut Butter Truffles
These little bites of joy go perfectly with a hot cup of coffee, a glass of cold milk, or even as part of a dessert platter with brownies or cookies. They’re also a great make-ahead treat for parties, tailgates, or family movie nights. Pair them with something light like Strawberry Jello Pie for a balanced dessert table. They also make the cutest homemade gift—just tuck them into a tin with a bow and prepare for smiles all around.
Key Tips for Making Peanut Butter Truffles
- Always use creamy (not natural) peanut butter for the best texture.
- Chill your dough before shaping—it makes dipping so much easier.
- A toothpick works wonders for dipping, and any small hole disappears under your chocolate drizzle.
- Work in batches—keep extra dough chilling while you dip the first round.
- Save any extra melted chocolate on your parchment paper by reheating it for your next batch.
Storage and Reheating Tips for Peanut Butter Truffles
Store your truffles in an airtight container in the refrigerator for up to 2 weeks. You can also freeze them for up to 3 months—just thaw in the fridge before serving. If you prefer your chocolate shell softer, let them sit at room temperature for about 10 minutes before eating. Pro tip: they taste incredible cold too!
FAQs
Can I use natural peanut butter?
Not for this one. Natural peanut butter is too oily and will make your truffles fall apart. Stick with the creamy kind.
Can I use dark chocolate instead of milk?
Absolutely! Dark chocolate adds a more grown-up flavor that pairs perfectly with the sweet filling.
Do these need to stay refrigerated?
Yes, especially if your kitchen is warm. The butter and cream will soften too much if left out too long.
Final Thoughts
If you’re craving something easy, fun, and downright delicious, these Peanut Butter Truffles are the way to go. They’re a sweet reminder that homemade treats don’t have to be complicated to taste incredible. And if you love these, check out our Strawberry No-Bake Cake Balls for another no-bake dessert win. Quick, simple, and totally irresistible—just how dessert should be.
Visit our Pinterest for regular slow cooker recipe updates, or join our Facebook discussions where cooking fans exchange their favorite hearty meal ideas.
Print
Peanut Butter Truffles – The Best No-Bake Chocolate Treat
- Prep Time: 15 minutes
- Total Time: 1 hour 15 minutes
- Yield: 18 truffles 1x
- Category: Dessert
- Method: No-Bake
- Cuisine: American
Description
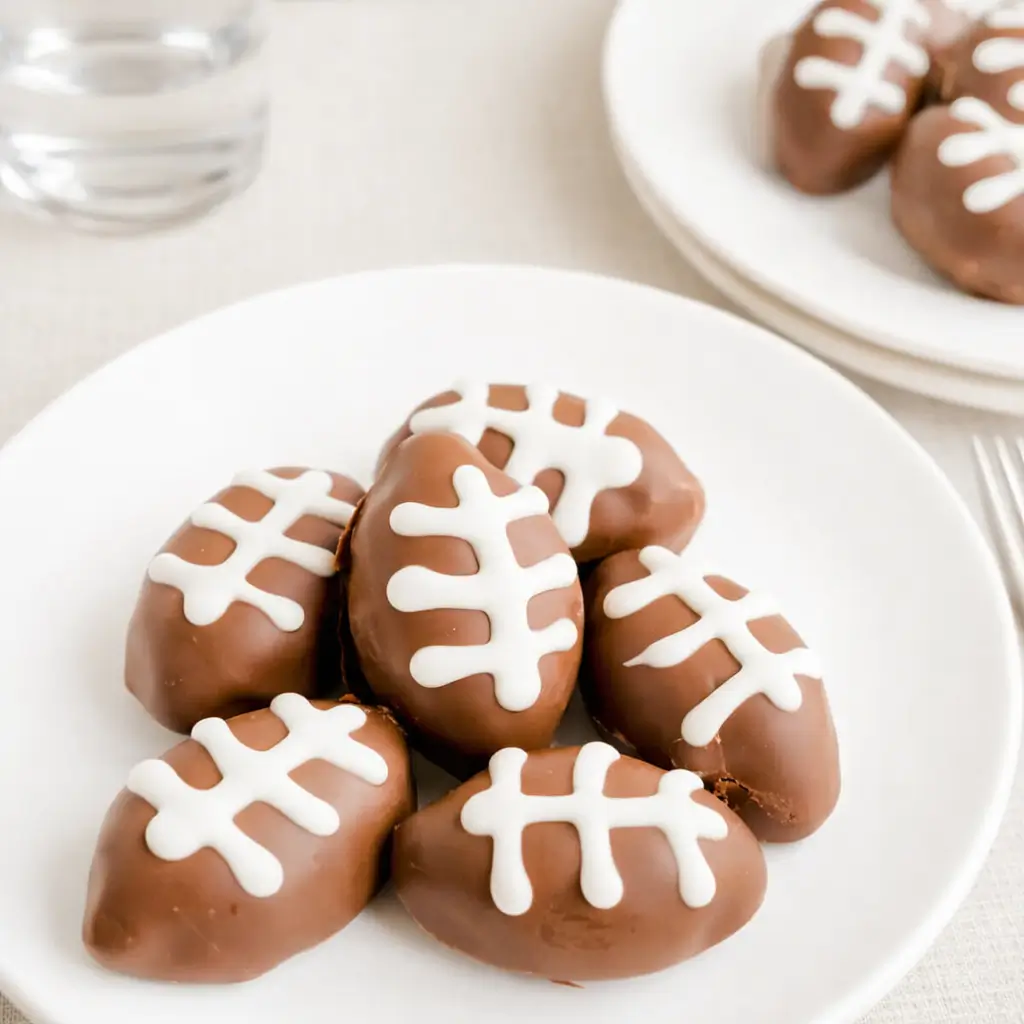
These sweet and salty peanut butter truffles are the perfect no-bake treat for game day! Shaped like footballs and decorated with white chocolate laces, they’re as festive as they are delicious.
Ingredients
- 1 cup creamy peanut butter
- 5 tablespoons salted butter, melted
- 1 tablespoon heavy whipping cream
- 1 tablespoon vanilla extract
- 1½ cups powdered sugar
- 1 cup milk chocolate chips or Baker’s melting chocolate (Ghirardelli wafers recommended)
- ¼ cup white chocolate melting wafers (melted, for football stripes)
Instructions
1. Combine peanut butter, melted butter, heavy cream, and vanilla in a bowl. Blend until smooth.
2. Add powdered sugar and continue blending until mixture is completely creamy.
3. Refrigerate or freeze the dough for at least 1 hour to firm up.
4. Roll chilled dough into 1-inch balls, then shape into footballs by rolling and pinching the ends.
5. Melt the milk chocolate according to package instructions. Use a toothpick to dip each chilled football-shaped truffle into the melted chocolate, allowing excess to drip off.
6. Place dipped truffles onto a parchment-lined baking sheet. Refrigerate to set.
7. Melt white chocolate wafers. Transfer to a plastic bag with a snipped corner and pipe laces on each truffle to create a football design.
8. Let the white chocolate harden before serving.
Notes
Do not use natural peanut butter, as it may separate.
Ghirardelli melting wafers melt smoothly and work great for dipping and decorating.
Work in small batches when dipping so truffles stay firm.
Save any leftover chocolate on the parchment—reheat for future use.
Toothpicks make dipping easier and any holes will be hidden by the piped laces.
Nutrition
- Serving Size: 1 truffle
- Calories: 78