Crunchy Apple Crisp is the dessert equivalent of a cozy fall sweater—warm, sweet, and impossible not to love. Imagine tender cinnamon-spiced apples under a buttery oat topping that crackles with every bite. It’s the kind of dessert that fills your kitchen with the scent of home, comfort, and just the right amount of nostalgia. Whether you’re serving it for a casual weeknight treat or dressing it up for Thanksgiving, this Crunchy Apple Crisp will make you the dessert hero everyone thanks twice. Plus, it’s beginner-friendly—no pie crusts to fuss over, just simple layering, baking, and enjoying. Pair it with a scoop of vanilla ice cream, and you’ve got a dessert that’s both classic and irresistible.
Table of Contents
Table of Contents
What is Crunchy Apple Crisp?
Crunchy Apple Crisp is a baked dessert made with layers of thinly sliced apples coated in sugar, cinnamon, and lemon juice, then topped with a sweet, buttery mixture of oats, brown sugar, and flour. As it bakes, the apples soften and bubble beneath a golden, crunchy topping that’s just the right balance of chewy and crisp. Unlike apple pie, there’s no crust—making it far simpler and quicker to prepare while still delivering all those comforting apple-cinnamon flavors we love. This treat is especially popular during the fall months when apples are at their peak, though honestly, no one’s stopping you from making it in July. It’s one of those “anytime” desserts that’s both homey and crowd-pleasing.
Reasons to Try Crunchy Apple Crisp
If you need convincing to bake this Crunchy Apple Crisp, here are a few irresistible reasons. First, it’s beginner-proof—no fancy techniques, no special equipment, just mixing and layering.
Second, it’s adaptable. You can use any apples you have (Granny Smith for tartness or Honeycrisp for sweetness) and toss in nuts, raisins, or even a splash of bourbon if you’re feeling fancy. Third, it’s universally loved. Even picky eaters and non-dessert people can’t resist the combination of warm, spiced apples and a crumbly, buttery topping. And finally, it’s the perfect make-ahead dessert for gatherings. Serve it warm from the oven, or reheat it later—it’s delicious either way. Pair it with ice cream, whipped cream, or even Greek yogurt for a breakfast-turned-dessert twist.
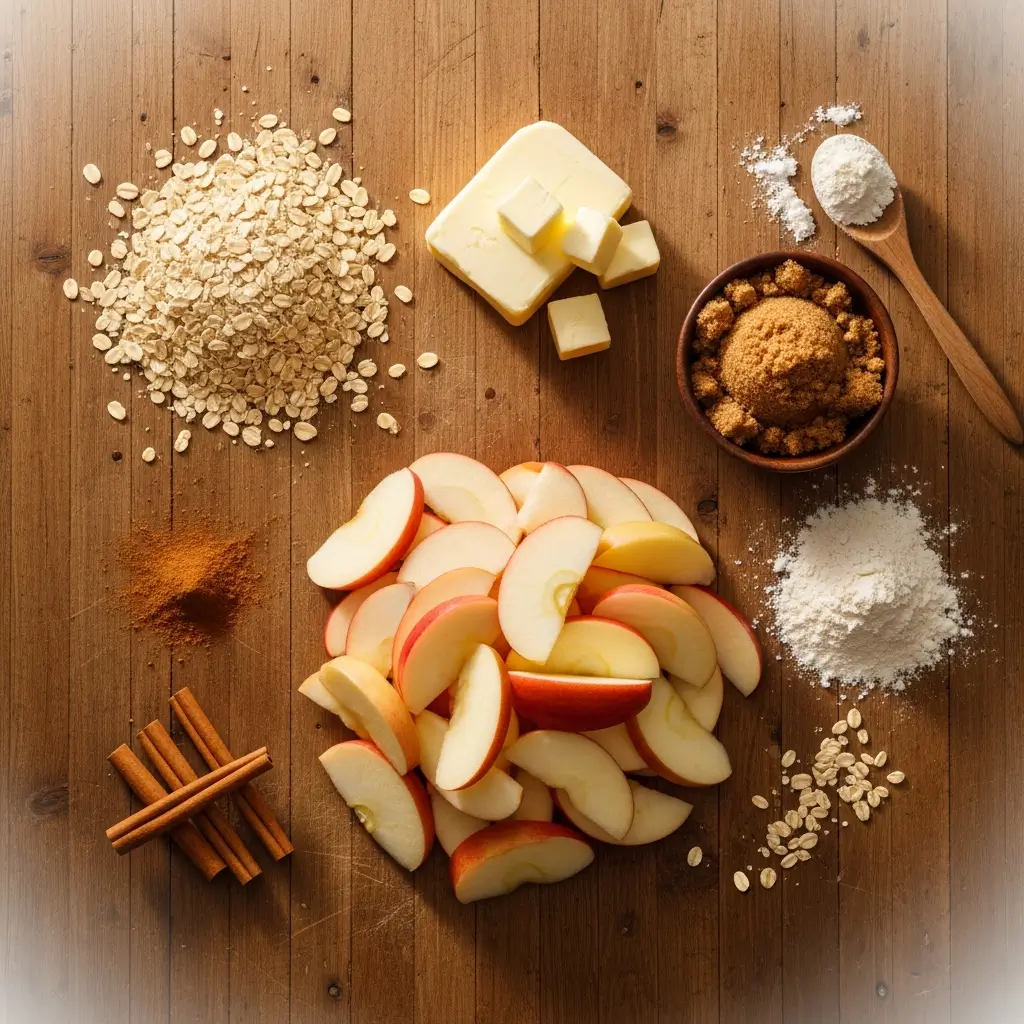
Ingredients Needed to Make Crunchy Apple Crisp
- 6 cups thinly sliced apples (Granny Smith or Honeycrisp)
- 2 tablespoons granulated sugar
- 1 ½ teaspoons ground cinnamon, divided
- 1 tablespoon lemon juice
- 1 cup all-purpose flour
- 1 cup old-fashioned oats
- ¾ cup packed brown sugar
- ¼ teaspoon salt
- ½ teaspoon nutmeg
- ½ cup unsalted butter, melted
- ½ teaspoon vanilla extract
Instructions to Make Crunchy Apple Crisp
Making Crunchy Apple Crisp is one of those simple joys in the kitchen — it’s quick, forgiving, and so satisfying. Follow this step-by-step guide to transform fresh apples into a warm, golden dessert that tastes like fall in every bite. Each step includes practical tips, small details that make a big difference, and a few pro secrets you’ll wish you knew sooner.
Step 1: Preheat and Prepare
Start by preheating your oven to 350°F (175°C). It’s important to do this first so your oven reaches the right temperature by the time your crisp is assembled. If you’re new to baking, check out our basic oven prep tips to make sure your dessert bakes evenly.
While the oven warms up, lightly grease a 9×13-inch baking dish with butter or nonstick spray. This helps prevent sticking and ensures your apple base caramelizes beautifully. You can also use individual ramekins for a personal touch — they bake faster and make serving effortless.
Step 2: Slice and Season the Apples
Now for the heart of this recipe — the apples! Peel, core, and thinly slice 6 cups of apples. If you have both Granny Smith and Honeycrisp on hand, use a mix; the tartness of one and the sweetness of the other create perfect balance.
Place the slices into a large mixing bowl and sprinkle in 2 tablespoons of granulated sugar, 1 teaspoon of cinnamon, and 1 tablespoon of lemon juice. Toss everything together until the apples are evenly coated. The lemon juice not only adds brightness but also keeps the apples from browning.
If you’d like to experiment with flavors, you can explore some creative apple variety swaps and spice ideas in our Autumn Apple Salad guide.
Step 3: Make the Oat Topping
Here’s where the crunchy magic happens. In a separate bowl, mix 1 cup of flour, 1 cup of old-fashioned oats, ¾ cup of brown sugar, ½ teaspoon of nutmeg, ½ teaspoon of cinnamon, and ¼ teaspoon of salt. Give everything a good stir to blend the dry ingredients evenly.
Next, pour in ½ cup of melted unsalted butter and ½ teaspoon of vanilla extract. Stir gently until the mixture forms soft crumbs — not a dough, but those beautiful buttery clumps that turn into a golden crust when baked. If you want a heartier texture, try adding a handful of chopped pecans or walnuts (see how nuts transform flavor in our Honey Cinnamon Oatmeal Bread).
Step 4: Layer and Assemble
Now, grab your greased baking dish. Spread the apple mixture evenly on the bottom, creating a flat layer so each bite has equal apple goodness.
Then, sprinkle your oat topping evenly over the apples. Don’t press it down — keeping it loose helps it crisp up beautifully in the oven. Think of this step as “blanketing the apples” rather than compacting them. If you see a few apple slices peeking through, that’s okay! Those spots caramelize beautifully during baking.
Step 5: Bake to Golden Perfection
Place the dish in the preheated oven and bake for about 45 minutes, or until the top turns golden brown and the edges start bubbling. You’ll know it’s ready when your kitchen smells like cinnamon heaven. If you’re unsure whether it’s done, peek underneath the crumble — the apples should be tender but not mushy.
This step-by-step baking process gives the apples time to soften while allowing the topping to crisp up perfectly. For a deeper flavor, rotate the pan halfway through to make sure it browns evenly.
Step 6: Cool, Rest, and Serve
Once your crisp is out of the oven, resist the urge to dig in right away (I know—it’s hard). Let it rest for about 10 minutes. This short resting time allows the bubbling syrup to thicken slightly, making the crisp easier to serve and even more flavorful.
Serve it warm, preferably with a scoop of vanilla ice cream or a dollop of whipped cream. For an extra fall-inspired touch, drizzle with caramel sauce or honey. If you’re pairing this dessert with dinner, try it after our Low-Carb Tuscan Chicken — a hearty main that complements the sweetness perfectly.
Step 7: Storing Leftovers (Bonus Step!)
If you somehow end up with leftovers (rare, but it happens), store your Crunchy Apple Crisp in an airtight container. It keeps well in the fridge for up to five days and reheats beautifully. Reheat it in the oven at 350°F for about 10 minutes to restore its crunch. For tips on getting that fresh-out-of-the-oven texture, visit our storage and reheating guide.
Final Thought:
This step-by-step Crunchy Apple Crisp guide isn’t just about baking — it’s about creating moments that feel cozy, comforting, and homemade. Each bite tells the story of simple ingredients working together in perfect harmony. So grab your favorite apples, preheat that oven, and follow these steps to dessert perfection.
If you loved this recipe, you might also enjoy our Cinnamon Sweet Potato Breakfast Cookies — another warm, cinnamon-scented treat that’s just as easy and delicious.
What to Serve with Crunchy Apple Crisp
You can’t go wrong serving Crunchy Apple Crisp warm with a scoop of vanilla ice cream—the cold creaminess melts into the warm apples and crumbly topping like magic. If ice cream isn’t your thing, try whipped cream, caramel drizzle, or even a dollop of Greek yogurt for a tangy twist. For brunch, it pairs beautifully with coffee or chai tea. You can also serve it alongside savory dishes, like roasted pork or chicken, to balance flavors with a touch of sweetness. For something unexpected, try it chilled with a drizzle of honey—it’s surprisingly refreshing.
Key Tips for Making Crunchy Apple Crisp
The secret to a perfect Crunchy Apple Crisp lies in the texture. Slice the apples evenly so they cook at the same rate. If you prefer more crunch, mix in chopped pecans or walnuts to the topping. For a deeper caramel flavor, use dark brown sugar. Don’t skip the lemon juice—it brightens up the apples and keeps them from turning mushy. And if your topping seems too dry before baking, add a tablespoon more melted butter. This crisp is forgiving and foolproof, which is why it’s one of those recipes you can’t really mess up, even if you try.
Storage and Reheating Tips for Crunchy Apple Crisp
Store leftovers in an airtight container at room temperature for up to two days or in the refrigerator for up to five. When reheating, pop it in the oven at 350°F for about 10 minutes to restore its crunch (the microwave works in a pinch, but you’ll lose some crispiness). You can also freeze baked apple crisp—just cool it completely, cover tightly, and freeze for up to three months. Reheat from frozen at 350°F until warmed through. Pro tip: always serve it warm; that’s when the buttery crumble and spiced apples truly shine.
FAQs
Can I make Crunchy Apple Crisp ahead of time? Yes! Assemble it, cover, and refrigerate for up to 24 hours before baking.
Can I use quick oats instead of old-fashioned oats? You can, but old-fashioned oats give a better crunch.
What are the best apples to use? Granny Smith, Honeycrisp, or a mix of both for the best flavor balance.
Can I make it gluten-free? Yes—substitute the flour with almond or oat flour and use certified gluten-free oats.
Final Thoughts
Crunchy Apple Crisp is comfort food at its sweetest. It’s simple, reliable, and guaranteed to bring smiles to the table. Whether you’re baking it for a family gathering or just because your kitchen felt a little too quiet, this dessert brings a taste of fall in every bite. Want more warm, seasonal goodness? Don’t miss our Honey Cinnamon Oatmeal Bread or Cinnamon Sweet Potato Breakfast Cookies. So grab those apples, melt that butter, and let your oven do the rest—because happiness really can be baked in a dish.
Visit our Pinterest for regular slow cooker recipe updates, or join our Facebook discussions where cooking fans exchange their favorite hearty meal ideas.
Print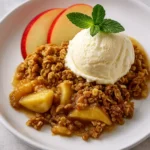
Crunchy Apple Crisp
- Prep Time: 20 mins
- Cook Time: 45 mins
- Total Time: 1 hr 15 mins
- Yield: 8 servings 1x
- Category: Dessert
- Method: Baking
- Cuisine: American
- Diet: Vegetarian
Description
This crunchy apple crisp boasts perfectly spiced apples topped with a golden, oat-filled crumb that brings warmth and sweetness to your dessert table.
Ingredients
- 6 cups of thinly sliced apples (Granny Smith or Honeycrisp work well)
- 2 tablespoons of granulated sugar
- 1 1/2 teaspoons of ground cinnamon
- 1 tablespoon of lemon juice
- 1 cup of all-purpose flour
- 1 cup of old-fashioned oats
- 3⁄4 cup of packed brown sugar
- 1⁄4 teaspoon of salt
- 1⁄2 teaspoon of nutmeg
- 1⁄2 cup of unsalted butter, melted
- 1⁄2 teaspoon of vanilla extract
Instructions
1. Preheat your oven to 350°F (175°C).
2. In a large mixing bowl, combine the sliced apples with granulated sugar, 1 teaspoon of cinnamon, and lemon juice. Toss until well mixed and apples are coated. Set aside.
3. In another bowl, mix together the flour, oats, brown sugar, remaining 1/2 teaspoon of cinnamon, salt, and nutmeg.
4. Pour the melted butter and vanilla extract into the dry mixture, stirring until crumbs form and all ingredients are combined.
5. Spread the apple mixture evenly in a 9×13-inch baking dish.
6. Sprinkle the oat mixture evenly over the apples, ensuring all the apples are covered.
7. Bake in the preheated oven for 45 minutes, or until the topping is golden brown and the apples are tender.
8. Allow the crisp to cool slightly before serving for the best texture.
Notes
For extra flavor, try adding a handful of chopped nuts, such as pecans or walnuts, to the topping mixture.
Serve this crisp warm with a scoop of vanilla ice cream or a dollop of whipped cream for a delicious dessert.
If you prefer a sweeter dish, you can increase the amount of sugar to taste.
This recipe is a great way to use up apples that are slightly bruised or overripe.
Nutrition
- Serving Size: 1 portion
- Calories: 350